Skip to content

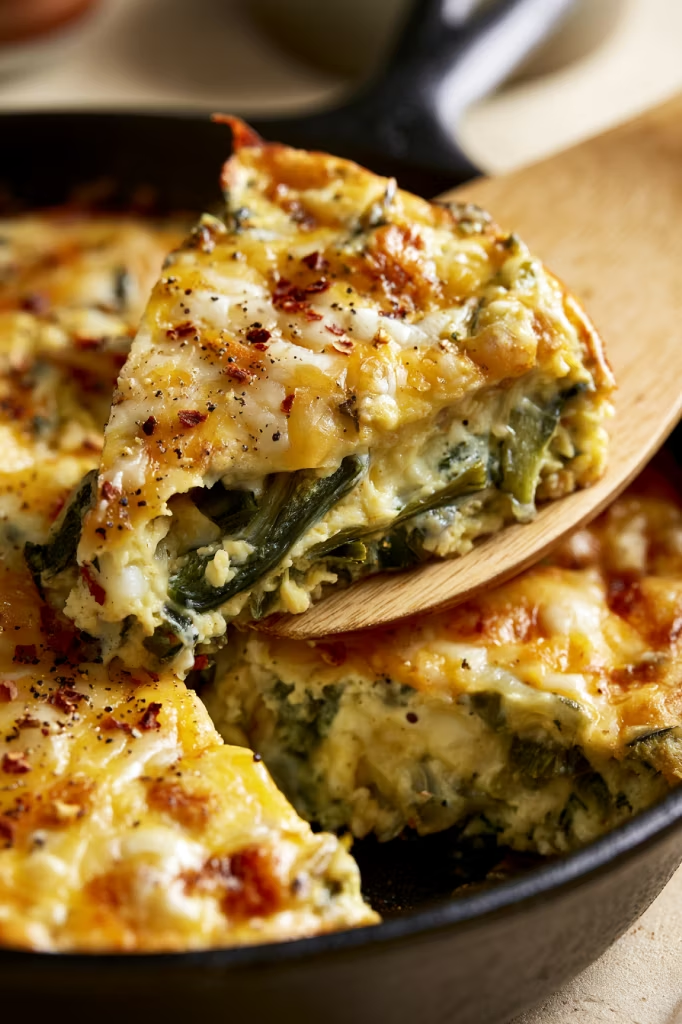
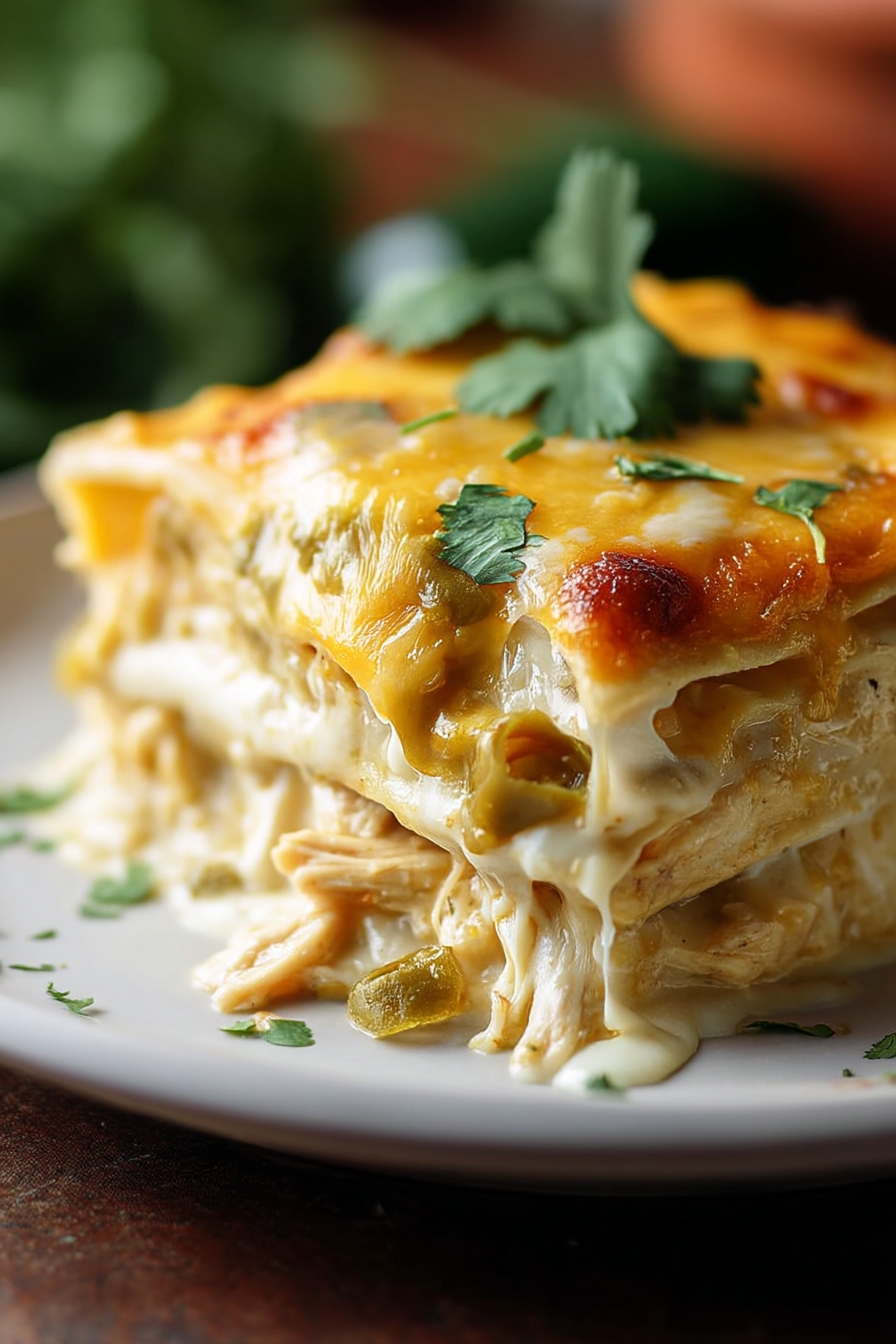
Warm from the oven with tender green chiles tucked around plenty of melted cheese, this Chile Relleno Casserole is the kind of simple, satisfying meal that works just as well for brunch as it does for dinner.
If you love chile rellenos but rarely feel like tackling all the stuffing, battering, and frying that traditionally comes with them, this casserole is such a handy alternative. You still get the combination that makes chile rellenos so good—roasted green chiles, creamy melted cheese, and a light egg batter—but everything comes together in one baking dish.
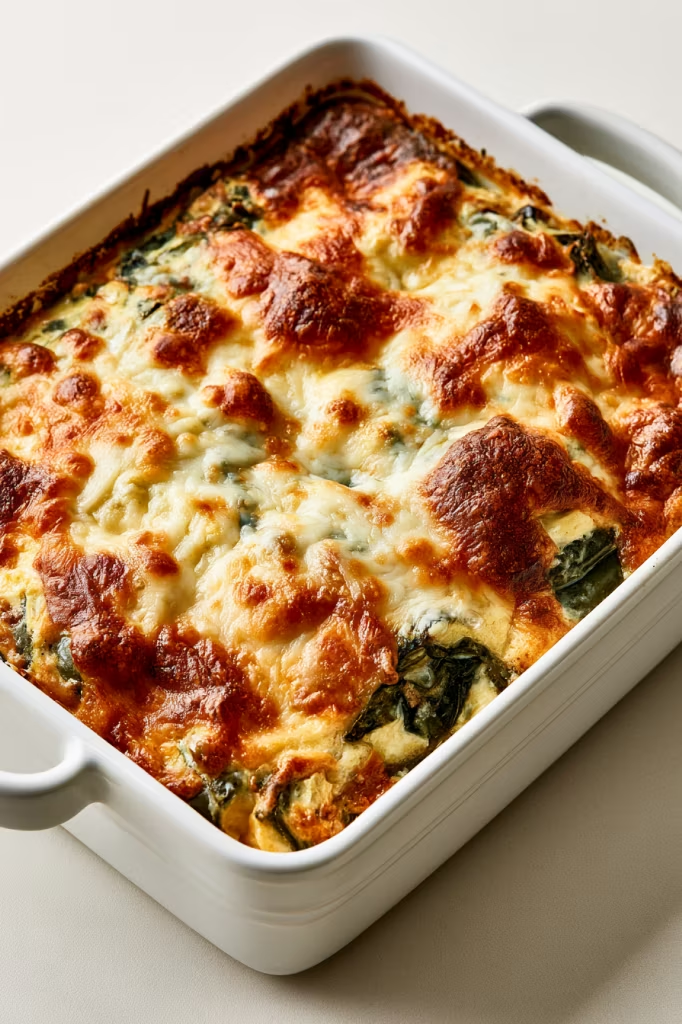
I especially love what happens in the oven. The cheese melts inside the chiles, the egg mixture becomes soft and puffy around them, and the cheese scattered over the top turns golden and bubbly. Give it a few minutes to rest when it comes out of the oven, then slice it up and add your favorite toppings. Salsa, avocado, cilantro, or a spoonful of sour cream are all delicious here.
Why You’ll Love This Recipe
There’s a lot to love about this casserole, but its simplicity is what really makes it worth keeping around. Instead of frying individual chile rellenos, you assemble everything in a casserole dish and let the oven take care of the rest.
It keeps the good parts of chile rellenos. You still have roasted green chiles and lots of Monterey Jack cheese, surrounded by a tender egg mixture.
There’s no frying. Once the chiles are filled and the egg mixture is poured over them, the casserole goes straight into the oven.
The ingredient list is short. Green chiles, cheese, eggs, flour, and milk make up the heart of the dish.
It fits almost any meal. Make it for a leisurely weekend breakfast, add it to a brunch spread, or serve it with beans and rice for dinner.
You can get a head start. Assemble it the day before, refrigerate it, and bake it the next day.
And the leftovers are worth saving! A reheated slice makes an especially easy breakfast or lunch.
Ingredients You’ll Need
Here’s a quick look at the simple ingredients that come together in this Chile Relleno Casserole.
- Whole Green Chiles – Roasted green chiles are the heart of this casserole. Hatch chiles are a great choice, but Anaheim or poblano peppers work well too. Canned whole chiles make prep especially easy.
- Monterey Jack Cheese – This is the cheese tucked inside the chiles. It melts beautifully as the casserole bakes, giving you that creamy, gooey center that makes chile rellenos so satisfying.
- Eggs – The eggs create the light, fluffy base that surrounds the cheese-stuffed chiles and holds the casserole together.
- All-Purpose Flour – Just a little flour gives the egg mixture structure so it sets properly in the oven. A 1-to-1 gluten-free all-purpose flour can also be used.
- Milk – Milk is whisked into the eggs to make the baked mixture softer and creamier. Whole milk works especially well, though you can use the milk you normally keep on hand.
- Salt and Pepper – A simple seasoning that brings out the flavors of the chiles, eggs, and cheese.
- Grated Cheese – A little extra cheese goes over the casserole before baking, creating a bubbly, golden layer on top.
Step-by-Step Instructions
Let’s make the casserole!
1. Prepare the pan and chiles
Start by preheating the oven to 350°F (175°C) and lightly coating a 9×9-inch or 7×11-inch casserole dish with cooking spray or spray oil.
Rinse the green chiles under cold water and carefully remove the seeds. Pat them dry with paper towels before you begin filling them. Taking out more of the seeds will also help keep the finished casserole on the milder side.
2. Fill the chiles
Cut the Monterey Jack cheese into sticks or strips and tuck it inside the chiles. Arrange the filled peppers close together in a single layer in the prepared baking dish.
And don’t worry if one of the soft roasted chiles tears while you’re working with it! Just bring it back together as best you can and place the split side down in the dish.
3. Make the egg mixture
Add the eggs to a large bowl and beat them with a fork or whisk until smooth.
Add the flour, milk, salt, and pepper, and whisk again until everything is well combined and the mixture is smooth.
4. Assemble the casserole
Pour the egg mixture over the cheese-filled chiles, making sure it spreads throughout the baking dish. Finish with the grated cheese over the top.
5. Bake
Bake at 350°F (175°C) for 60–90 minutes. You’ll know it’s ready when the casserole is set and puffed, with bubbling cheese and a golden top.
Let it rest for 10 minutes before slicing. This little wait gives everything a chance to settle and makes the casserole much easier to serve.
Expert Tips
Dry the chiles before assembling. Canned roasted chiles can hold quite a bit of liquid, so patting them dry helps keep unnecessary moisture out of the casserole.
Adjust the heat through the seeds. For a milder casserole, rinse the chiles well and remove the seeds carefully. If you enjoy more heat, you can leave some behind.
A torn chile is completely fine. Roasted peppers are delicate, so splitting happens. Once everything is covered with the egg mixture and baked, it won’t matter.
Watch for visual cues instead of only watching the timer. The stated baking range is 60–90 minutes, so look for a center that is set and puffed and a top that is golden and bubbling.
Let it rest. Give the finished casserole the full 10 minutes before cutting into it. The texture will settle as it sits.
Want a more golden top? A brief minute or so under the broiler after baking can add extra browning. Keep a close eye on it—the cheese can brown quickly!

Recipe Variations
One nice thing about this recipe is that you have a few ways to change it without making the preparation complicated.
Try another green chile. Hatch green chiles are a great choice, but poblano or Anaheim peppers work too.
Use diced chiles. Can’t find whole roasted chiles? Use 2–3 (4-ounce) cans of diced green chiles instead. Spread them in the baking dish, add diced or shredded cheese, pour over the egg mixture, and bake.
Change the cheese. Monterey Jack melts beautifully, but cheddar or pepper Jack can be used instead. Oaxaca or Cotija can also bring a different flavor to the dish.
Skip stuffing the individual peppers. Layer the chiles across the bottom of the baking dish, add cubes or shredded cheese, and pour the egg mixture over everything. It’s an especially convenient option when you want to get the casserole assembled quickly.
Make it gluten-free. Replace the all-purpose flour with a 1-to-1 gluten-free all-purpose flour.
Storage & Reheating
This is a good casserole to make when you know you’ll appreciate having leftovers waiting in the refrigerator.
Store leftover slices in an airtight container in the refrigerator for up to 3 days. Reheat them in the microwave for a quick meal, or warm them in the oven until heated through.
You can also assemble the entire casserole up to 1 day ahead. Cover it and refrigerate it, then set it on the counter for 20–30 minutes before baking according to the recipe.
For longer storage, let the baked casserole cool completely, cover it securely with plastic wrap or foil, and freeze it for up to 1 month. Thaw it overnight in the refrigerator and reheat it, covered with foil, in a 250–300°F oven until warmed through. Individual slices can also go straight into the microwave for reheating.
Serving Suggestions
Serve this Chile Relleno Casserole warm, when the cheese is still wonderfully soft and melty. For breakfast or brunch, it can easily be the centerpiece of the meal with fresh fruit or another simple side.
For dinner, I like the idea of turning it into a fuller Mexican-inspired plate with refried beans, black beans, or Mexican rice alongside it.
And then there are the toppings! Spoon over salsa or pico de gallo, add sliced avocado or guacamole, or finish each serving with cilantro, green onions, jalapeños, chopped tomatoes, hot sauce, or sour cream. You can put a few toppings on the table and let everyone finish their own slice.
However you serve it, the best part is cutting through that fluffy baked egg layer and finding the roasted chiles and melted cheese underneath.
Recipe FAQs
1. Can I use canned green chiles instead of roasting fresh ones?
Yes! Canned whole roasted green chiles make this recipe especially easy. Just rinse them, remove the seeds, and pat them dry before adding the cheese. There’s no need to roast or peel fresh peppers unless you want to.
2. What if I can’t find whole green chiles?
You can use 2–3 (4-ounce) cans of diced green chiles instead. Simply spread the chiles in the baking dish, add the cheese, and pour the egg mixture over the top. It’s an easy shortcut and there’s no stuffing required.
3. How do I know when the Chile Relleno Casserole is done?
The casserole is ready when the center is set and puffed and the cheese on top is bubbly and golden. It can take 60–90 minutes at 350°F (175°C), so start checking it around the 60-minute mark. Let it rest for 10 minutes before slicing.
4. Can I make Chile Relleno Casserole ahead of time?
Yes, this is a great recipe to prep ahead! Assemble the casserole up to 1 day in advance, cover, and store it in the refrigerator. When you’re ready to bake, let it sit on the counter for 20–30 minutes, then bake as directed.
5. How do I keep my Chile Relleno Casserole from getting watery?
Make sure to drain the chiles well and pat them dry with paper towels before assembling the casserole. They can hold quite a bit of extra moisture. Also, make sure the center is completely set before taking it out of the oven and give it the full 10-minute rest before serving.


Chile Relleno Casserole
Ingredients
- 12 ounces whole roasted green chiles, or one large 27-ounce can for a double batch, rinsed, patted dry, and seeds removed
- 1/2 pound Monterey Jack cheese, sliced into sticks
- 2 Large eggs, room temperature
- 1/2 cup all-purpose flour, or substitute with a good 1-to-1 all-purpose gluten-free flour
- 1 tsp kosher salt, plus pepper if desired
- 2 cup milk, whole milk recommended
- 1 cup Jack cheese, shredded, for topping
Optional Toppings
- Cilantro
- Pico de gallo or salsa
- Fresh avocado or guacamole
- Sour cream
Instructions
- Preheat the oven to 350°F (175°C). Lightly coat a 9×9-inch or 7×11-inch casserole dish with cooking spray or spray oil.
- Rinse the green chiles under cold water. Carefully remove the seeds, then pat the chiles dry with paper towels.
- Cut the Monterey Jack cheese into sticks or strips. Place cheese inside each chile, then arrange the stuffed chiles in a single layer in the prepared baking dish. If a chile tears while being filled, place it in the dish with the torn side facing down.
- Add the eggs to a large bowl and beat with a fork or whisk until evenly blended.
- Add the flour, milk, salt, and pepper. Whisk until the mixture is smooth.
- Pour the egg mixture evenly over the cheese-filled chiles.
- Sprinkle the grated cheese over the top.
- Bake at 350°F (175°C) for 60–90 minutes, until the casserole is puffed, set, bubbling, and golden on top.
- Allow the casserole to rest for 10 minutes before serving.
.
Recipe Notes
Nutrition
Per serving: Calories: 334 kcal | Carbohydrates: 15 g | Protein: 20 g | Fat: 22 g | Saturated Fat: 13 g | Cholesterol: 122 mg | Sodium: 1007 mg | Potassium: 266 mg | Fiber: 1 g | Sugar: 4 g | Vitamin A: 729 IU | Vitamin C: 19 mg | Calcium: 554 mg | Iron: 2 mg