Skip to content
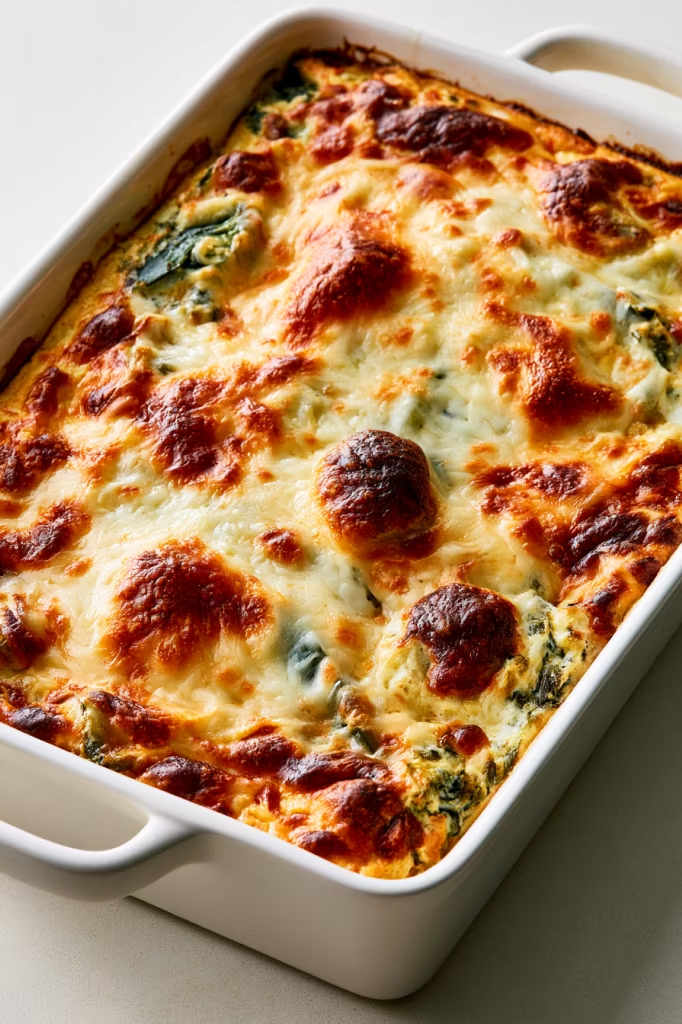
Cheesy, smoky, and wonderfully simple, this Low-Carb Hatch Chile Rellenos Casserole is an easy way to enjoy the flavors of chile rellenos—without stuffing, battering, or frying a single pepper.
If there’s one thing I look forward to when Hatch chiles are in season, it’s finding another reason to cook with them. Once roasted, the chiles become tender and deeply flavorful, with just enough heat to balance all that rich, melty cheese.
That’s exactly what makes this casserole so good. Instead of preparing chile rellenos one at a time, you layer the roasted peppers with crumbly cotija and sharp cheddar, pour seasoned eggs over everything, and let the oven do the rest. The top gets cheesy and bubbly, the center becomes tender and set, and you still get plenty of roasted chile in every bite.
It’s simple enough for breakfast, satisfying enough for dinner, and especially handy when you have a pile of freshly roasted Hatch chiles waiting to be used.
Why You’ll Love This Recipe
There’s a lot to love about traditional chile rellenos, but the stuffing, battering, and frying can turn them into quite a project. This casserole keeps things much simpler. You still get layers of roasted green chiles and cheese, but everything goes straight into one baking dish.
I especially love the combination of cheeses here. Sharp cheddar melts into all the little spaces between the peppers, while cotija or queso fresco brings a salty, crumbly contrast. Eggs hold the layers together, turning a handful of straightforward ingredients into a casserole that feels substantial without being heavy on carbs.
It’s also one of those recipes that can fit almost anywhere in the day. Serve it warm for breakfast, add a salad for lunch, or bring it to the table as a vegetarian main or cheesy side dish for dinner.
Ingredients You’ll Need
Here’s what each ingredient brings to this chile rellenos casserole:
- Chiles – Hatch chiles are the star here, bringing that wonderful roasted green chile flavor to every layer. Poblanos, pasilla, or Anaheim chiles work too. Whichever you use, they’re charred first, then the skins and seeds are removed.
- Queso Fresco or Cotija Cheese – This gives the casserole a salty, crumbly cheese layer that pairs especially well with the roasted chiles. Ricotta can also be used for a similar texture and flavor.
- Sharp Cheddar Cheese – For all that melty, cheesy goodness! Sharp cheddar has enough flavor to stand up to the chiles and gets deliciously melted as the casserole bakes.
- Eggs – Beaten eggs are poured over the layers of chiles and cheese, helping everything set together into a sliceable casserole.
- Kosher Salt – A little salt seasons the eggs and brings out the flavors of the chiles and cheese.
- Black Pepper – Adds a simple peppery note to the egg mixture without competing with the flavor of the roasted chiles.
- Olive Oil – Used to brush the baking dish before adding the chiles, helping prepare the dish for all those cheesy layers.
Step-by-Step Instructions
First, roast the chiles. Roast chiles under the broiler or on a charcoal grill, turning often, until the skin is blackened. Place them in a paper bag and close tightly. When chiles are cool enough to handle, pull away and discard the seed and inside veins.
Next, get the oven ready. Preheat oven to 375 degrees F.
Now you can start building the casserole. Brush olive oil on the bottom of a 10.5″ x 7.5″ baking dish. Line with chiles.
Then comes the cheese! Cover chiles with about 2 ounces of crumbled cotija and 4 ounces of shredded cheddar. Repeat twice, ending with cheeses on top. (three layers total).
For the final layer that brings everything together, beat the eggs, with the salt and pepper and pour over the chile and cheese mixture.
Cover with foil and bake at 375 degrees F. for 35-40minutes, or until cooked and no longer jiggly in center.
That’s it! Serve hot or room temperature.
Expert Tips
The chiles are really the heart of this recipe, so give them time to develop a good char. You want the outside to become blackened as they roast. Once they’ve steamed in the closed paper bag and cooled enough to handle, removing the skin, seeds, and inner veins will be much easier.
When you assemble the casserole, resist the temptation to put all the cheese on top. Dividing the cotija and cheddar among the three layers means you’ll get chiles and cheese together throughout the entire casserole.
And when it comes to baking, watch the center. The casserole is ready when it’s cooked through and the middle is no longer jiggly. You don’t have to rush it straight to the table either—it’s delicious served hot or at room temperature.

Recipe Variations
Hatch chiles are wonderful here, especially when you can get them freshly roasted, but you don’t have to wait for Hatch chile season to make this casserole. The recipe also works with poblanos, pasilla, or Anaheim chiles, so you can use whichever option is available to you.
There’s some flexibility with the cheese, too. Use queso fresco or cotija for that crumbly cheese layer. The recipe also allows ricotta cheese as a substitute for a similar texture and flavor.
I’d keep the rest simple. The combination of roasted peppers, sharp cheddar, eggs, and salty cheese already gives this casserole plenty of character.
Storage & Reheating
This is a great casserole to tuck away for later. After baking, cut the casserole into squares and wrap them well before freezing.
When you’re ready for another piece, defrost it the night before and heat each square for about 45–60 seconds in the microwave.
Freezing individual squares is especially convenient when you only want one serving—you can reheat what you need instead of warming the entire casserole again.
Serving Suggestions
This casserole is flexible enough to go from a weekend breakfast to an easy dinner. For breakfast or brunch, I’d keep things fresh and simple alongside it. Sliced avocado, tomatoes, or fresh fruit would all be nice against the rich cheese and roasted chiles.
For lunch, add a crisp green salad. The freshness and acidity of a simple salad are a great match for the warm, cheesy casserole.
And for dinner, make it the vegetarian centerpiece of the meal or serve smaller squares alongside other Mexican-inspired dishes. A fresh tomato salsa, avocado, grilled vegetables, or a crunchy slaw would all be right at home next to it.
Best of all, there’s no need to worry about getting it to the table the second it comes out of the oven. Since it can be enjoyed hot or at room temperature, it’s just as comfortable on a relaxed brunch table as it is at dinner.
Recipe FAQs
1. Do I have to use Hatch chiles?
No, you can definitely make this casserole without Hatch chiles. Poblanos, pasilla, or Anaheim chiles all work in this recipe too. Just make sure to roast them first and remove the skins, seeds, and inside veins before layering.
2. How do I make the roasted chiles easier to peel?
Place the hot roasted chiles in a paper bag and close it tightly. Let them sit until they’re cool enough to handle. The steam helps loosen the blackened skins, making them much easier to pull away.
3. Can I use pre-roasted Hatch chiles?
Yes, pre-roasted Hatch chiles are a great way to save some prep time. If they still have their skins and seeds, remove those before assembling the casserole. Then you can layer the prepared chiles with the cheese and continue with the recipe.
4. How do I know when the chile rellenos casserole is done?
The easiest way is to check the center. Bake the casserole covered at 375°F for 35–40 minutes. It’s ready when the eggs are cooked and the center is no longer jiggly.
5. Can I freeze this chile rellenos casserole?
Yes, this casserole freezes really well. Bake it first, cut it into squares, and wrap the pieces well. When ready to serve, defrost a portion in the refrigerator overnight and reheat each square in the microwave for about 45–60 seconds.


Low-Carb Hatch Chile Rellenos Casserole
Ingredients
- 1 1/2 pounds chiles, Hatch, poblanos, pasilla, or Anaheim chiles, charred, skins and seeds removed
- 6 ounces queso fresco or cotija cheese, you can also substitute ricotta cheese for a similar texture and flavor
- 12 ounces sharp cheddar cheese, grated
- 4 large eggs, beaten
- 1 tsp kosher salt
- 1/2 tsp black pepper
- 2 tbsp olive oil
Instructions
- Roast the chiles under the broiler or over a charcoal grill, turning them frequently, until their skins are blackened. Transfer the chiles to a paper bag and seal it tightly. Once they are cool enough to handle, remove and discard the seeds and inner veins.
- Preheat the oven to 375 degrees F.
- Brush the bottom of a 10.5″ x 7.5″ baking dish with the olive oil. Arrange a layer of chiles across the bottom.
- Top the chiles with approximately 2 ounces of crumbled cotija and 4 ounces of shredded cheddar. Repeat the chile-and-cheese layering process twice more, finishing with cheese on top. There should be three layers total.
- Beat the eggs together with the salt and pepper. Pour the egg mixture evenly over the layered chiles and cheese.
- Cover the baking dish with foil and bake at 375 degrees F for 35–40 minutes, or until the casserole is cooked through and the center no longer jiggles.
- Serve hot or at room temperature.
.
Recipe Notes
Nutrition
Calories: 303kcal | Carbohydrates: 7g | Protein: 16g | Fat: 23g | Saturated Fat: 12g | Cholesterol: 160mg | Sodium: 896mg | Potassium: 103mg | Fiber: 2g | Sugar: 3g | Vitamin A: 675IU | Vitamin C: 10.2mg | Calcium: 366mg | Iron: 0.9mg