Skip to content
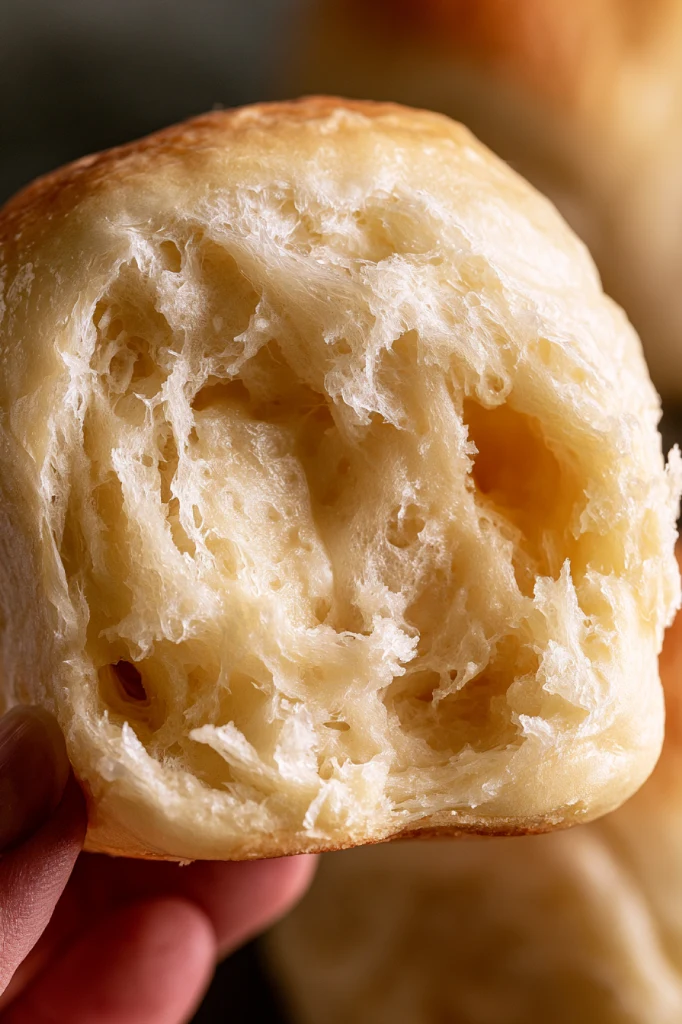
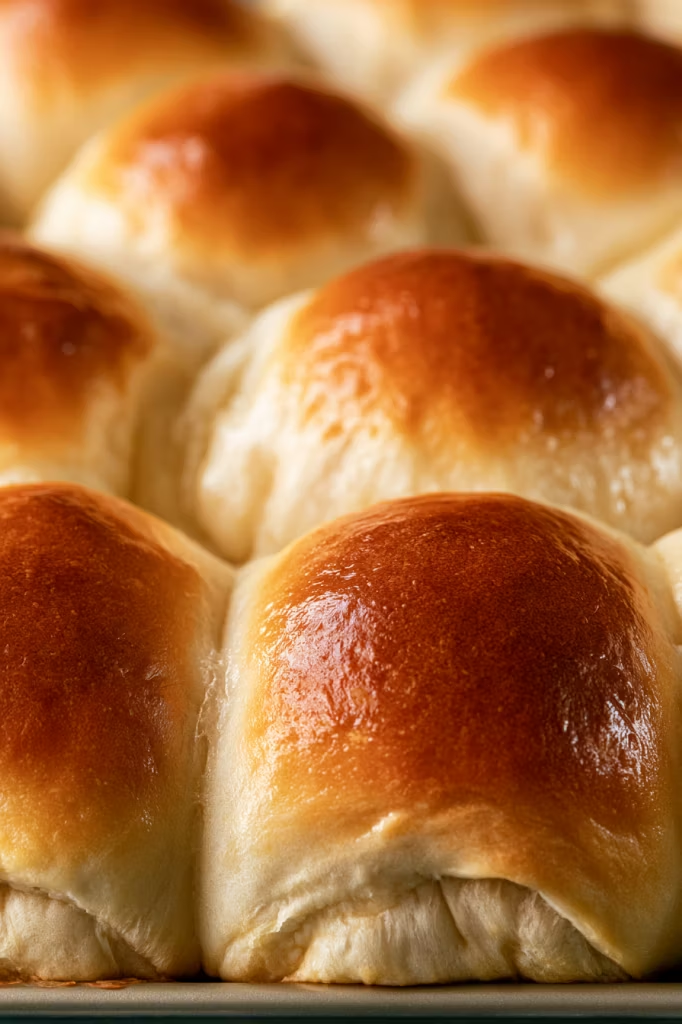
Warm from the oven and brushed with honey butter, these soft dinner rolls are the kind of bread that makes it hard to wait for dinner. They’re fluffy in the middle, lightly golden on top, and just rich enough from the milk, egg, and butter.
There’s something especially satisfying about pulling apart a pan of freshly baked rolls. The centers are tender and pillowy, the edges have just a little chew, and that optional honey-butter finish melts right into the warm tops. I love these for holiday dinners, but they’re simple and versatile enough to make whenever a meal could use a basket of homemade bread.
The dough does need time for two rises, but most of that time is hands-off. Once you’ve mixed and kneaded it, you can leave it to do its thing, shape it into little rounds, and let them get wonderfully puffy before they go into the oven.
Why You’ll Love This Recipe
These rolls have everything I want in a homemade dinner roll: a soft center, buttery flavor, and golden top. And while homemade yeast bread can sound like a project, the actual process here is pleasantly straightforward.
They’re wonderfully soft. Whole milk, butter, and egg enrich the dough, giving the baked rolls that tender, fluffy texture that makes them so good warm from the pan.
You can make them ahead. Shape the rolls the night before and refrigerate them, or freeze them for longer storage. It makes homemade bread much easier to fit into a holiday or dinner schedule.
They go with almost anything. Set them alongside soup, roast chicken, a holiday turkey, pasta, or a simple weeknight dinner. Leftovers are great for sliders and little sandwiches, too.
And if you want to make them feel a little extra special, don’t skip the optional honey butter. Brushed onto the rolls while they’re still warm, it gives the tops a buttery sheen and a hint of sweetness.
Dinner Roll Ingredients
Here’s what you’ll need to make these soft, buttery dinner rolls:
- Whole Milk – The warm milk provides moisture and helps activate the yeast. Whole milk also adds richness and contributes to the rolls’ soft, tender texture.
- Instant Yeast – This is what makes the dough rise and gives the rolls their light, fluffy interior. The recipe uses Platinum Yeast from Red Star, though active dry yeast can also be used with slightly longer rising times.
- Granulated Sugar – A small amount of sugar adds subtle sweetness and helps the yeast get to work.
- Egg – The egg enriches the dough while adding structure, helping create rolls that are soft but sturdy enough to pull apart.
- Unsalted Butter – Softened butter brings richness and buttery flavor to the dough. Make sure it’s at room temperature so it incorporates easily.
- Salt – An essential ingredient for balancing the slight sweetness and bringing out the flavor of the bread.
- All-Purpose Flour or Bread Flour – Either works well here. All-purpose flour produces classic soft dinner rolls, while bread flour gives them a slightly chewier texture.
For the Optional Honey Butter Topping
- Unsalted Butter – Melted butter brushed over the freshly baked rolls gives the tops extra richness and a beautiful finish.
- Honey – Mixed with the melted butter for a touch of sweetness that pairs especially well with the warm, buttery rolls.
Step-by-Step Instructions
First, make the dough.
Whisk the warm milk, yeast, and 1 Tablespoon of sugar together and give the mixture 5 minutes to sit. Then add the remaining sugar, egg, softened butter, salt, and flour according to the recipe instructions.
As everything comes together, you’re looking for a dough that is soft and a little sticky, but still workable. Resist the temptation to keep adding flour just because the dough feels tacky. That softness is part of what gives you tender rolls later.
Next, knead.
Knead the dough for 5 full minutes, either with the mixer or by hand. By the end, it should feel smooth, soft, and elastic.
A gentle poke should slowly spring back. You can also stretch a small piece of dough into a thin sheet; if light can pass through before it tears, it’s ready.
Let it rise.
Place the dough in a lightly greased bowl, cover it, and leave it in a relatively warm spot for 1–2 hours, or until it has doubled in size.
This is mostly waiting time, so you can step away while the yeast does the work.
Shape the rolls.
Punch down the risen dough and divide it into 14–16 pieces. Shape each one into a smooth ball and arrange the rolls in your prepared baking pan.
They don’t need to be absolutely identical. Once they rise and bake together, they’ll form that beautiful pull-apart pan of rolls.
Let them get puffy.
Cover the pan and give the shaped rolls their second rise for about 1 hour. They should look noticeably fuller and puffier before they go into the oven.
Finally, bake.
Bake at 350°F (177°C) for 20–25 minutes, rotating the pan halfway through. When the tops are golden, pull them from the oven.
If you’re using the optional topping, brush the warm rolls with the melted butter and honey mixture. Let them cool for just a few minutes, then serve while they’re still wonderfully soft and warm.
Expert Tips
The biggest thing to remember with these rolls is not to make the dough too dry. A soft, slightly tacky dough might feel a little messier to work with, but it helps create that fluffy texture once baked. Add extra flour only when the dough is too wet to knead, and add it gradually.
Temperature matters, too. Warm the milk to about 110°F (43°C) so it’s ready for the yeast. When it comes to rising, pay attention to the dough rather than relying entirely on the clock. The first rise is finished when the dough has doubled; the second is ready when the shaped rolls look nicely puffed.
And keep an eye on them in the oven. Baking on a lower rack helps protect the tops from browning too quickly. If they’re already golden before the centers are finished, loosely cover the pan with foil and continue baking.
Recipe Variations
One of the easiest ways to change these rolls is already built right into the recipe.
For honey butter dinner rolls, combine the optional 2 Tablespoons (28g) melted unsalted butter with 1 Tablespoon honey and brush it over the rolls as soon as they come from the oven. The warm bread absorbs some of the butter while the honey leaves a subtle sweetness on top.
You can also choose between the two flour options in the original recipe. All-purpose flour gives you classic soft dinner rolls, while bread flour creates a slightly chewier texture without requiring any other changes.
And while round rolls are simple and classic, you can shape the same dough into other individual roll shapes if you want something a little different for the table.

Storage & Reheating
These rolls are definitely hard to beat on the day they’re baked, especially when they’re still a little warm. But they keep well, too.
Cover leftovers tightly and store them at room temperature for 2–3 days or in the refrigerator for up to 1 week. If you want to keep them longer, let the baked rolls cool completely and freeze them for up to 3 months.
For a whole pan of rolls, lightly cover and warm them in a 300°F (149°C) oven for about 10 minutes, or until heated through.
You can freeze the rolls before baking as well. Shape them as directed, freeze them in the prepared pan, and store them for up to 3 months. When you’re ready for fresh rolls, let them thaw and rise at room temperature for about 4–5 hours, then bake according to the recipe.
Serving Suggestions
I love these rolls most when they’re served warm enough for butter to soften as soon as it touches the center. They’re an easy addition to a cozy dinner, but they’re especially at home on a holiday table.
Serve them alongside roast chicken or turkey, beef, mashed potatoes and gravy, soups, stews, pasta, or a big dinner salad. They’re also perfect for catching the last bit of sauce or gravy left on your plate.
And don’t overlook the leftovers. Split a roll and turn it into a breakfast sandwich, tuck in your favorite sandwich fillings for lunch, or use a batch for little sliders. A quick warm-up brings back much of that soft, fresh-from-the-oven texture.
Recipe FAQs
1. Why didn’t my dinner rolls rise?
This can happen if the yeast is no longer active, the milk is too hot, or the dough needs more time. Make sure the milk is warmed to about 110°F (43°C) and give the dough enough time to double in size. If your kitchen is cool, the rise may simply take a little longer.
2. Why are my dinner rolls dense instead of soft and fluffy?
Too much flour can make the rolls heavy and dense. The dough should be soft and slightly tacky, so don’t keep adding flour until it feels completely dry. If it’s too sticky to knead, add flour just 1 teaspoon at a time until it becomes manageable.
3. Can I make these dinner rolls without a stand mixer?
Yes, you definitely can. Mix the dough in a large bowl with a wooden spoon or silicone spatula, then knead it by hand on a lightly floured surface for 5 full minutes. It takes a little more work, but the rolls will turn out just as delicious.
4. How do I know when the dinner rolls are ready to bake?
After shaping the rolls, cover them and let them rise for about 1 hour. You’ll know they’re ready when they look noticeably puffy and larger in size. Don’t worry if they need a little extra time, especially if your kitchen is on the cooler side.
5. Can I make these dinner rolls ahead of time?
Yes! Prepare and shape the rolls, then cover them tightly and refrigerate for up to about 15 hours. The next day, remove them from the refrigerator at least 3 hours before you need them and let them rise on the counter for about 1–2 hours before baking. You can also freeze the shaped rolls for up to 3 months.


Soft, Buttery Dinner Rolls
Ingredients
- 1 cup (240ml) whole milk, warmed to about 110°F (43°C)
- 2 1/4 tsp Platinum Yeast from Red Star instant yeast (1 standard packet)
- 2 tbsp granulated sugar, divided
- 1 Large egg
- 1/4 cup (4 Tbsp; 56g) unsalted butter, softened to room temperature and cut into 4 pieces
- Salt
- 3 cup (390g) all-purpose flour or bread flour (spooned & leveled)
- Optional topping: 2 Tablespoons (28g) melted unsalted butter mixed with 1 Tablespoon honey
Instructions
- Start the dough. Add the warm milk, yeast, and 1 Tablespoon of the sugar to the bowl of a stand mixer and whisk together. Cover the bowl and leave the mixture for 5 minutes. If you do not have a stand mixer, use a large mixing bowl and combine the dough by hand with a sturdy wooden spoon or silicone spatula. A hand mixer is less suitable because this sticky dough tends to climb into the beaters.
- Mix. Add the remaining sugar, egg, butter, salt, and 1 cup of the flour. Using the dough hook or paddle attachment, mix on low speed for 30 seconds. Scrape down the bowl, add the remaining flour, and continue mixing on medium speed for about 2 minutes, until the dough forms and begins pulling away from the sides. If it is so wet that it cannot reasonably be kneaded, add additional flour 1 Tablespoon at a time. The finished dough at this stage should remain soft and slightly sticky while still being manageable with lightly floured hands.
- Knead. Continue kneading with the mixer for 5 full minutes, or transfer the dough to a lightly floured work surface and knead it by hand for 5 full minutes. If excessive sticking develops, add flour only 1 teaspoon at a time, either to the dough or the kneading surface. Avoid adding more than necessary, since the dough should remain soft and slightly tacky rather than becoming dry. To check it, press the dough with a finger; it should gradually spring back. You can also perform a windowpane test by stretching a golfball-size piece very thin. When it can stretch enough for light to pass through without tearing first, kneading is complete.
- First rise. Lightly coat a large bowl with oil or nonstick spray. Put the dough into the bowl and turn it so all sides receive a light coating. Cover with aluminum foil, plastic wrap, or a clean kitchen towel. Leave it in a relatively warm place for 1–2 hours, or until doubled in size.
- Prepare the pan. Grease a 9×13 inch baking pan or two 9-inch square or round baking pans. A cast iron skillet or lined baking sheet can also be used.
- Form the rolls. Punch down the risen dough to remove trapped air. Divide it into 14–16 equal pieces; exact uniformity is not necessary. Shape each portion into a smooth ball and place the balls in the prepared pan.
- Second rise. Cover the shaped rolls with aluminum foil, plastic wrap, or a clean kitchen towel. Let them rise for about 1 hour, until noticeably puffy.
- Heat the oven. Move an oven rack to a lower position and preheat the oven to 350°F (177°C). Baking toward the bottom of the oven helps prevent the tops from becoming too dark.
- Bake. Bake the rolls for 20–25 minutes, rotating the pan halfway through the baking time. They are ready when the tops are golden brown. If they begin browning too quickly, loosely cover the pan with aluminum foil. Remove from the oven and, if using it, brush the warm rolls with the honey-butter topping. Let them cool for a few minutes before serving.
- Store. Keep leftover rolls tightly covered at room temperature for 2–3 days, or refrigerate them for up to 1 week.
.
Recipe Notes
- Freezing unbaked rolls: Follow the recipe through step 6. Put the shaped rolls into a greased baking pan, cover tightly, and freeze for up to 3 months. Once completely frozen, the individual dough balls can be transferred to a freezer bag because they will no longer stick together. When you want to bake them, arrange them in a greased pan, cover, and allow them to thaw and rise at room temperature for about 4–5 hours. Bake according to the instructions above.
- Freezing baked rolls: Cool the baked rolls completely before freezing them for up to 3 months. Thaw them either in the refrigerator or at room temperature and reheat as desired. To warm an entire pan, cover it lightly and place it in a 300°F (149°C) oven for about 10 minutes, or until the rolls are warm.
- Overnight option: Complete the recipe through step 6, tightly cover the shaped rolls, and refrigerate them for up to about 15 hours. At least 3 hours before serving, take them from the refrigerator, leave them covered, and allow them to rise on the counter for approximately 1–2 hours before baking.
- Alternatively, refrigerate the dough during its first rise. Cover it tightly and refrigerate for up to about 15 hours. After removing it from the refrigerator, allow another 2 hours for the dough to finish rising, then continue with step 5.
- Ingredient and Equipment Notes
- Yeast: Platinum Yeast from Red Star is an instant yeast. Red Star active dry yeast can also be used, although the rising stages will take slightly longer.
- Flour: Either all-purpose flour or bread flour works without any other recipe adjustments. Bread flour gives the rolls a somewhat chewier texture, while both options produce soft, fluffy rolls.
- Baking pan: A 9×13-inch glass baking pan can help prevent overly rapid browning, but other suitable pans work as well. When using a pan that browns quickly, keep the rolls on a lower oven rack and watch their color toward the end of baking.
- Useful equipment: A stand mixer fitted with a dough hook or paddle makes mixing easier, though a large bowl and wooden spoon or silicone spatula work for hand mixing. A bench scraper is useful for portioning the dough, and a pastry brush makes applying the optional honey-butter topping easier.
Nutrition
Calories: 135kcal | Carbohydrates: 21g | Protein: 4g | Fat: 4g | Saturated Fat: 2g | Cholesterol: 21mg | Sodium: 192mg | Potassium: 56mg | Fiber: 1g | Sugar: 2g | Vitamin A: 111IU | Vitamin C: 0mg | Calcium: 24mg | Iron: 1mg Estimated per serving based on 16 rolls and excluding the optional honey-butter topping. Actual nutrition will vary depending on the flour, milk, butter, and other brands used.