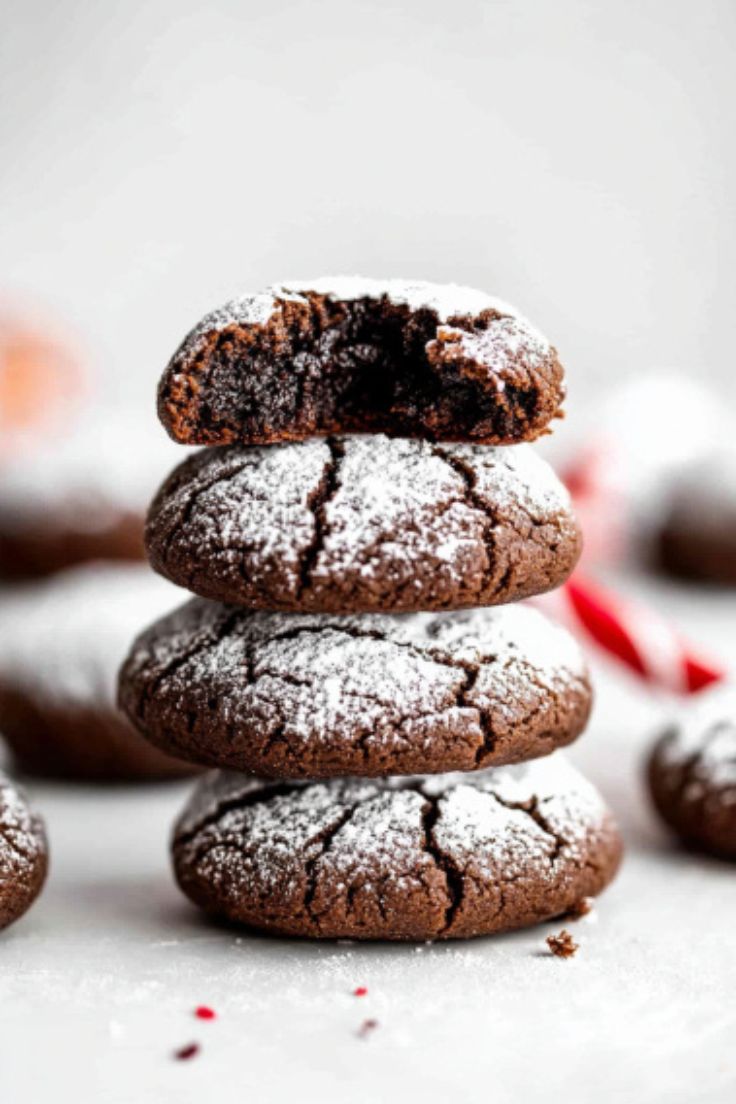
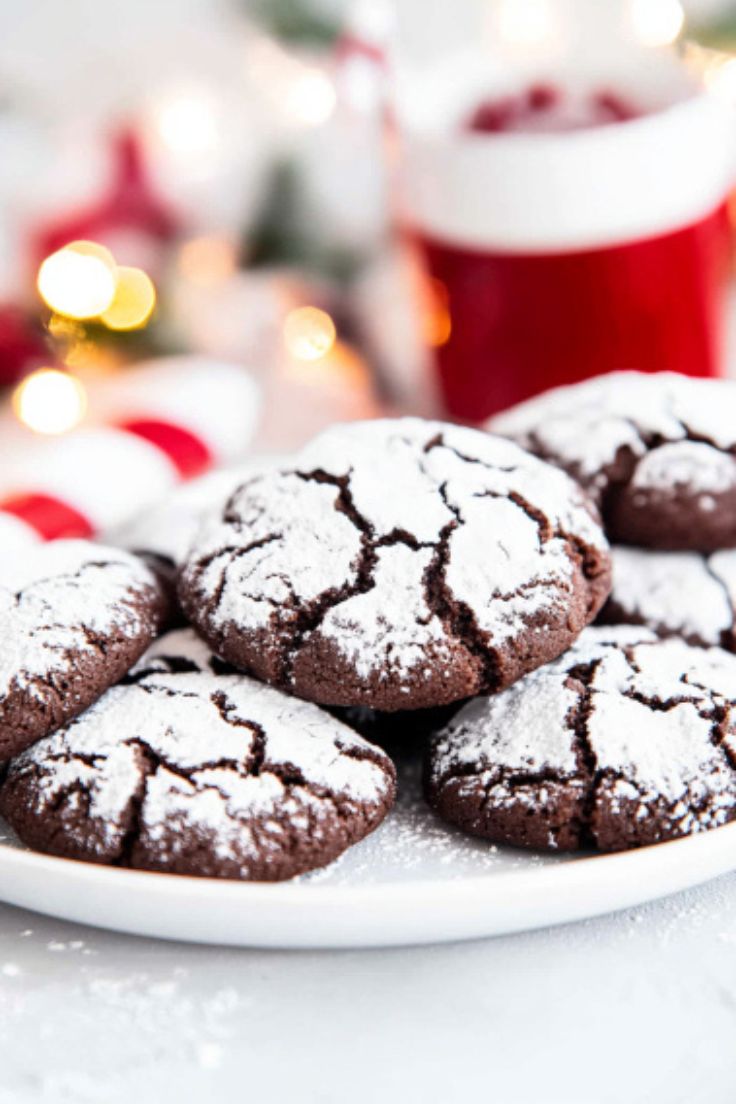
Chocolate Crinkle Cookies

This cookie recipe was a long time coming! Over the years, I’ve tried crinkle cookies that were either too dry, too cakey, or just not quite right.
But no holiday cookie tray (or chocolate lover’s kitchen) is complete without a truly perfect crinkle cookie—so I set out to create one.
Here it is.
These Chocolate Crinkle Cookies are rich, fudgy, and perfectly crinkled, with a soft, chewy center and a crackly powdered sugar coating.
They come together with simple pantry staples, yet taste indulgent enough to be bakery-worthy.
Whether you’re baking for the holidays, a cozy weekend treat, or just because you love chocolate (who doesn’t?), this easy, foolproof recipe is for you!
I hope it becomes a go-to in your kitchen, just like it has in mine.
For Chocolate Crinkle Cookies
- Cocoa Powder – Gives these cookies their deep, rich chocolate flavor. Be sure to use unsweetened cocoa powder.
- Granulated Sugar – Sweetens the cookies and helps create their signature crinkled texture.
- Vegetable Oil – Keeps the cookies moist and gives them a chewy texture.
- Eggs – Helps bind the dough together and adds structure to the cookies.
- Vanilla Extract – Enhances the chocolate flavor with a warm, sweet aroma.
- All-Purpose Flour – Provides structure and ensures the cookies hold their shape.
- Baking Powder – Gives the cookies a slight rise and helps with the crinkle effect.
- Salt – Balances the sweetness and enhances the chocolate flavor.
- Powdered Sugar – Coats the cookies before baking, creating the classic crinkle appearance.

Chocolate Crinkle Cookies
.
Ingredients
- 1 cup (100g) unsweetened cocoa powder
- 1¾ cups (350g) granulated sugar
- ½ cup (120mL) vegetable oil
- 4 large eggs, room temperature
- 2 teaspoons vanilla extract
- 2 cups (240g) all-purpose flour
- 2 teaspoons baking powder
- ¾ teaspoon salt
- 1 cup (120g) powdered sugar
Instructions
- Mix Wet Ingredients
In a large bowl, combine the cocoa powder, sugar, and vegetable oil. Beat with a hand mixer or stand mixer on medium speed until the mixture is smooth and glossy. - Incorporate Eggs & Vanilla
Add the eggs one at a time, mixing well after each addition. Stir in the vanilla extract. - Prepare Dry Ingredients
In a separate bowl, whisk together the flour, baking powder, and salt. - Combine Wet & Dry Mixtures
Gradually add the flour mixture to the cocoa mixture, mixing on low speed until just combined. - Chill the Dough
Cover the dough with plastic wrap and refrigerate for at least 4 hours or overnight. - Preheat & Prep
Preheat the oven to 350°F (175°C). Line two baking sheets with parchment paper. Place the powdered sugar in a small bowl. - Shape & Coat
Using a small cookie scoop or tablespoon, scoop out chilled dough and roll into 1-inch balls. Roll each ball in powdered sugar until well coated, then place them 2 inches apart on the baking sheets. (Only roll as many as you plan to bake at a time; keep the remaining dough refrigerated.) - Bake & Cool
Bake for 10-12 minutes, or until the edges are set and the centers look slightly soft. Let the cookies cool on the baking sheet for a few minutes before transferring them to a wire rack to cool completely.
Tips & Variations
- Chilling is key! The dough is sticky, so chilling helps make it easier to handle and prevents flat cookies.
- Slight deflation is normal. The centers will naturally sink as the cookies cool, making them extra fudgy.
- Flavor twists: Try adding 1 teaspoon of peppermint or orange extract for a different taste.
- Boost the chocolate flavor: Stir in 1 teaspoon of instant espresso powder with the sugar and oil for an extra-rich taste.
Nutrition
Calories: 87kcal | Carbohydrates: 15g | Protein: 1g | Fat: 3g | Saturated Fat: 1g | Polyunsaturated Fat: 1g | Monounsaturated Fat: 1g | Trans Fat: 0.02g | Cholesterol: 16mg | Sodium: 61mg | Potassium: 39mg | Fiber: 1g | Sugar: 10g | Vitamin A: 23IU | Calcium: 15mg | Iron: 1mg
1. Why did my cookies turn out flat?
Uh-oh! If your cookies spread too much and lost that beautiful crinkle, it’s likely because:
- Your baking powder isn’t fresh—old leavening agents mean no lift!
- You skipped or rushed the chilling step—warm dough spreads like crazy in the oven.
The Fix: Double-check that your baking powder is fresh, and don’t skimp on chilling time! At least 4 hours in the fridge (or overnight) works best.
2. Can I use Dutch-processed cocoa powder instead of regular cocoa?
Yep, you sure can! Both natural and Dutch-processed cocoa will work, but…
- Natural cocoa gives a slightly more acidic, intense chocolate flavor.
- Dutch-processed cocoa is smoother and darker in color.
No matter which you choose, you’ll still get rich, chocolatey cookies!
3. Do I really have to chill the dough?
I get it—you’re excited to bake! But trust me, chilling is non-negotiable.
- It firms up the dough so you can roll it easily.
- It prevents cookies from spreading too much (we want them thick and fudgy, not flat!).
- It enhances the flavor, making them even more chocolatey.
Short on time? Stick the dough in the freezer for 1 hour instead of the fridge!
4. Why aren’t my cookies crinkling?
If your cookies don’t have that signature crackle, it’s likely because:
- The dough was too warm before baking.
- You didn’t coat them generously in powdered sugar (don’t be shy with the sugar—more is better!).
Quick Fix: Chill the dough properly, and roll each cookie twice in powdered sugar before baking. That extra coating makes all the difference!
5. How do I store these cookies to keep them soft and fudgy?
Want to keep that perfect texture? Here’s how:
- Room temp: Store in an airtight container for up to 5 days.
- Freeze the dough: Roll into balls (skip the sugar coating), freeze, then bake fresh when you need them!
- Freeze baked cookies: Wrap them well, freeze for up to 3 months, and thaw when needed!
Bonus Tip: Pop a slice of bread in the container to keep cookies soft longer (the bread absorbs moisture, so your cookies stay perfect!).
Enjoy & happy baking!