Skip to content

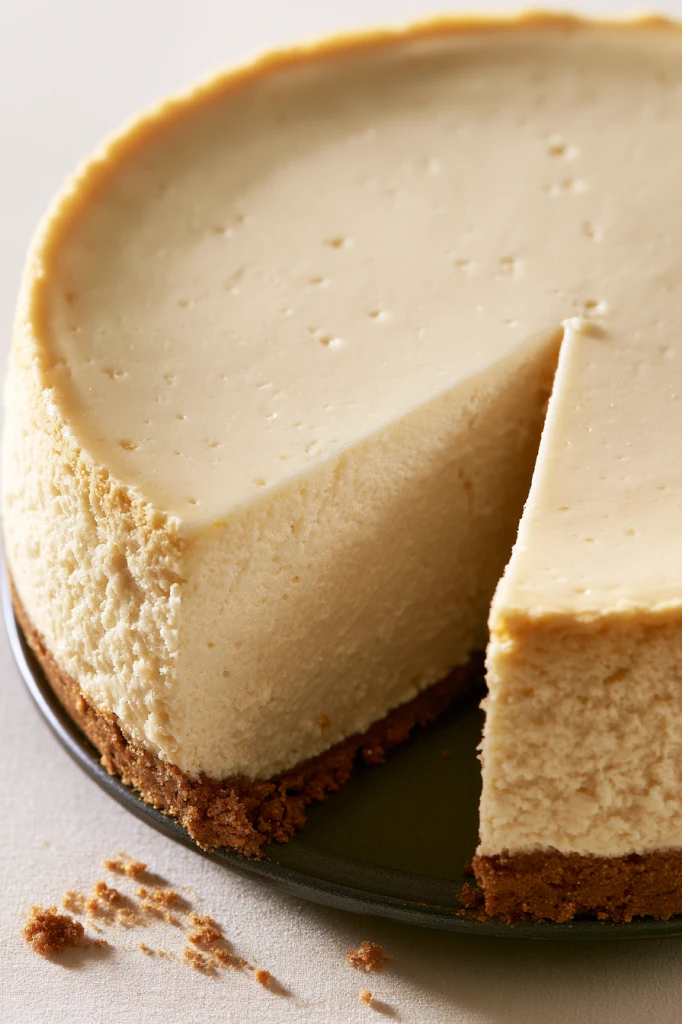
With a buttery graham cracker crust and a thick, creamy filling, this classic cheesecake is the kind of dessert that makes any occasion feel a little more special. And the best part? You can make it without a water bath.
There’s something especially satisfying about pulling a cheesecake from the oven and seeing that softly set, jiggly center. The ingredient list is simple, but together, cream cheese, sour cream, vanilla, and eggs create a filling that’s wonderfully rich and smooth.
I love this cheesecake for celebrations, holidays, or anytime I want a dessert I can make ahead. It needs plenty of time to chill, so you can prepare it the day before, tuck it into the fridge, and have dessert ready when you need it.
Why You’ll Love This Recipe
This cheesecake has everything I look for in a classic one: a crisp graham cracker crust, a creamy center, and just enough vanilla to round out the tangy cream cheese and sour cream.
But what really makes this recipe appealing is how approachable it is. There’s no water bath! Instead, the cheesecake bakes at a gentle temperature and cools gradually before going into the refrigerator.
It’s also a wonderful make-ahead dessert. Give it at least 6 hours to chill—or leave it overnight—and it’ll be ready to slice and serve the next day.
Cheesecake Ingredients
- Cream Cheese – this is the heart of the cheesecake and gives it that rich, smooth, creamy texture. Be sure to use brick-style cream cheese and let it soften to room temperature first.
- Sugar – sweetens the cheesecake and balances the tanginess of the cream cheese and sour cream.
- Sour Cream – adds extra creaminess and a subtle tang while helping create that soft, luxurious cheesecake texture.
- Vanilla Extract – adds warm vanilla flavor and rounds out the richness of the filling.
- Salt – just a small amount helps balance the sweetness and bring out the other flavors.
- Eggs – give the cheesecake structure and help the filling set as it bakes. Use room-temperature eggs and lightly beat them before adding.
For the Graham Cracker Crust
- Graham Cracker Crumbs – form the crisp, slightly sweet base for the creamy cheesecake filling.
- Sugar – adds sweetness to the crust and complements the graham crackers.
- Brown Sugar – gives the crust a little extra depth and caramel-like sweetness. White sugar can be substituted.
- Butter – melted butter holds the crumbs together and gives the crust its rich, buttery flavor.
Step-by-Step Instructions
Let’s make cheesecake!
First, make the crust. Preheat the oven to 325F (160C). Combine the graham cracker crumbs, sugar, and brown sugar, stirring well. Add the melted butter and use a fork to combine everything thoroughly.
Pour the crumbs into a 9” springform pan and press them firmly over the bottom and up the sides. Set the pan aside while you make the filling.
Next, make the cheesecake filling. Add the cream cheese to the bowl of a stand mixer or a large bowl with a hand mixer. Stir until it’s smooth and creamy, being careful not to over-beat it and incorporate too much air.
Add the sugar and stir again until creamy. Then, mix in the sour cream, vanilla extract, and salt until well combined. If you’re using a stand mixer, stop occasionally to scrape down the sides and bottom of the bowl with a spatula.
Now, add the eggs. With the mixer on low speed, gradually add the lightly beaten eggs one at a time, stirring just until each one is incorporated. Once all the eggs are in, scrape the sides and bottom of the bowl again to make sure everything is evenly combined.
Then, bake. Pour the cheesecake batter into the prepared springform pan. To insure against leaks, place the pan on a cookie sheet lined with foil.
Transfer it to the center rack of the oven and bake at 325F (160C) for 50-60 minutes, or longer as needed. The edges will likely be slightly puffed and may just be starting to turn light golden brown. The center should spring back when touched but still have a Jello-like jiggle.
Finally, cool and chill. Remove the cheesecake from the oven and let it cool on top of the oven for 10 minutes. Run a knife gently around the inside of the springform pan to loosen the crust, but don’t remove the ring.
Let the cheesecake cool for another 1-2 hours, or until it’s close to room temperature. Then transfer it to the refrigerator and chill overnight or for at least 6 hours. Remove the springform ring just before serving.
Expert Tips
Cheesecake is surprisingly simple once you know what to look for. A few small details can make a big difference.
Start with room-temperature ingredients. Softened cream cheese blends much more easily into a smooth filling, and the eggs should be at room temperature too.
Go easy on the mixing. Once the filling is smooth, you don’t want to beat lots of extra air into it. This is especially important when you add the eggs. Keep the mixer on low and stir only until each egg disappears into the batter.
Scrape the bowl as you go. Cream cheese loves to hide at the bottom of the mixing bowl! Scraping the sides and bottom helps everything combine evenly.
Look for the jiggle. Don’t wait for the center to become completely firm in the oven. When the cheesecake is ready, the edges should look set while the middle is still Jello-jiggly.
And don’t worry if yours needs a little extra oven time. Depending on your oven, pan, baking sheet, and ingredient temperatures, the cheesecake can take as long as 75 minutes. Start checking at 50 minutes and add time as needed.
Most importantly, let it cool gradually. After the initial 10-minute rest, loosening the crust from the pan allows the cheesecake to contract as it cools. Give it another 1-2 hours before moving it to the refrigerator.

Recipe Variations
I love this cheesecake plain, but it’s also the perfect blank canvas for toppings.
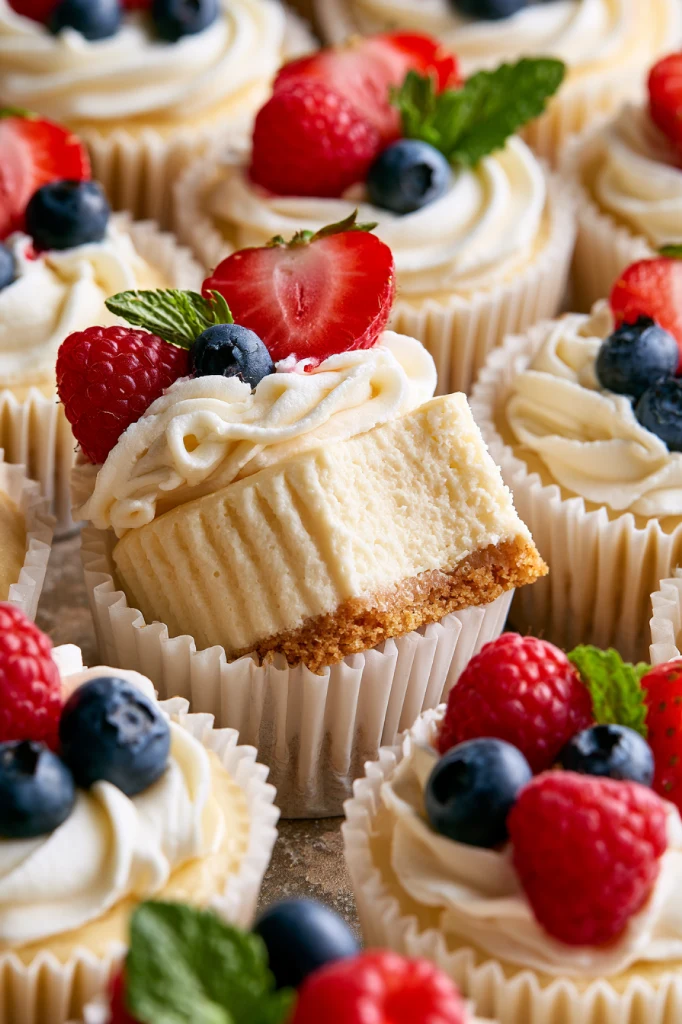
For something fresh, pile sliced strawberries or mixed berries over each piece. A spoonful of raspberry, blueberry, strawberry, or cherry sauce is lovely too.
Craving something richer? Drizzle the slices with chocolate or caramel sauce. Or keep things simple with a cloud of whipped cream on top.
Adding these toppings at serving time means you can keep the original cheesecake recipe exactly the same while giving each slice a different finish.
Storage & Reheating
Cheesecake is a great dessert to make ahead because it needs time in the refrigerator anyway. Keep it chilled and covered until you’re ready to serve it.
Don’t leave the cheesecake at room temperature for more than 4 hours, and refrigerate it sooner if the room is especially warm or humid.
You can freeze it too! Once the cheesecake has cooled and chilled as instructed, wrap it thoroughly in plastic wrap and then in foil. It will keep in the freezer for several months. When you’re ready for a slice, transfer the cheesecake to the refrigerator and let it thaw overnight.
There’s no reheating necessary here—this cheesecake is meant to be enjoyed chilled.
Serving Suggestions
Sometimes the simplest way to serve cheesecake is the best. Cut a chilled slice, put it on a plate, and let that creamy filling and buttery graham cracker crust do all the work.
For a little extra color, add fresh strawberries, raspberries, or blueberries. Fruit sauce is another easy addition, especially when you want something bright to balance the rich filling.
For celebrations, I like the idea of setting out a few toppings—fresh fruit, whipped cream, chocolate sauce, and caramel—and letting everyone finish their own slice.
And if you’re serving it after a big dinner, keep things simple. A plain slice of cold, creamy cheesecake is already a pretty wonderful ending.
Recipe FAQs
1. Do I really need to bring the cream cheese and eggs to room temperature?
Yes, I recommend it. Softened cream cheese mixes much more easily and helps give the cheesecake that smooth and creamy texture. Room-temperature eggs also blend into the filling more easily without needing to overmix.
2. How do I know when my cheesecake is done?
The edges should look set and slightly puffed, while the center should still have a little Jello-like jiggle. Don’t wait until the middle is completely firm or you may end up overbaking the cheesecake. Start checking around 50 minutes and add more time as needed.
3. Why did my cheesecake crack?
This can happen if the filling is overmixed, the cheesecake is overbaked, or it cools too quickly. Make sure to mix the eggs on low speed just until combined and allow the cheesecake to cool gradually. After 10 minutes of cooling, run a knife around the inside of the pan to loosen the crust before letting it continue to cool.
4. Can I make this cheesecake ahead of time?
Yes, definitely! This is actually a great dessert to make ahead because it needs at least 6 hours to chill. I recommend making it the day before and letting it chill overnight so it’s completely set and ready to serve.
5. Do I need a water bath for this cheesecake?
No, you don’t need one for this recipe. Simply bake the cheesecake at 325F (160C) as directed, then let it cool gradually before transferring it to the refrigerator. It keeps the process nice and simple without adding the extra step of a water bath.


Classic Creamy Cheesecake
Ingredients
Graham Cracker Crust
- 1 1/2 graham cracker crumbs (170g)
- 2 tbsp sugar
- 1 tbsp brown sugar (can substitute white)
- 7 tbsp butter, melted
Cheesecake
- 32 oz cream cheese, softened to room temperature (910g)
- 1 cup sugar (200g)
- 2/3 cup sour cream (160g)
- 1 1/2 tsp vanilla extract
- Salt
- 4 large eggs, room temperature, lightly beaten
Instructions
- Preheat oven to 325F (160C).
- Prepare the graham cracker crust by combining the graham cracker crumbs, sugar, and brown sugar. Stir until evenly mixed. Pour in the melted butter and work it through the crumbs with a fork until thoroughly combined.
- Transfer the crumb mixture to a 9” springform pan. Press it firmly across the bottom and up the sides of the pan. Set aside.
- To prepare the cheesecake filling, place the cream cheese in the bowl of a stand mixer or a large mixing bowl if using a hand mixer. Mix until smooth and creamy, taking care not to over-beat it or incorporate excess air.
- Add the sugar and mix again until the mixture is creamy.
- Add the sour cream, vanilla extract, and salt. Mix until everything is well combined. If using a stand mixer, stop periodically and scrape the sides and bottom of the bowl with a spatula to ensure the mixture is evenly blended.
- Turn the mixer to low speed. Gradually add the lightly beaten eggs one at a time, mixing only until each egg has been incorporated before adding the next. After all four eggs are added, scrape the sides and bottom of the bowl with a spatula and make sure the batter is evenly combined.
- Pour the cheesecake batter into the prepared springform pan. Place the pan on a foil-lined cookie sheet to protect against possible leaks.
- Place the cheesecake on the center rack of the oven and bake at 325F (160C) for 50-60 minutes, or longer as needed. The edges should be slightly puffed and may just begin to develop a light golden color. The center should spring back when touched but should still have a Jello-like jiggle. Avoid over-baking.
- Remove the cheesecake from the oven and leave it to cool on top of the oven for 10 minutes.
- After 10 minutes, carefully run a knife around the inside edge of the springform pan to release the crust from the sides. Leave the springform ring in place.
- Continue cooling the cheesecake for another 1-2 hours, or until it is close to room temperature.
- Transfer the cheesecake to the refrigerator and chill overnight or for at least 6 hours.
- Remove the springform ring just before serving.
.
Recipe Notes
- Graham cracker crust: If starting with whole graham crackers, crush them into fine crumbs before measuring.
- Cream cheese: Use brick-style cream cheese rather than spreadable cream cheese sold in tubs.
- Bake time: Baking time can vary depending on the oven, whether the cheesecake is sitting on a baking pan, the color of the springform pan, and the temperature of the ingredients. Begin checking the cheesecake at 50 minutes and continue baking as necessary. It may require as long as 75 minutes.
- Cooling: Cooling the cheesecake gradually helps reduce the chance of cracking. The top of the oven provides a warm place for the initial cooling period after baking.
- Convection ovens: This recipe has not been tested using a convection oven.
- Keep the cheesecake refrigerated. It should not remain at room temperature for more than 4 hours, and less time may be appropriate in particularly warm or humid conditions.
- For longer storage, the chilled cheesecake can be wrapped thoroughly in plastic wrap followed by foil and frozen for several months. Thaw it overnight in the refrigerator before serving.
Nutrition
Per 1 slice: Calories: 500 kcal | Carbohydrates: 32g | Protein: 8g | Fat: 36g | Saturated Fat: 22g | Polyunsaturated Fat: 1g | Monounsaturated Fat: 3g | Cholesterol: 179mg | Sodium: 450mg | Potassium: 45mg | Fiber: 1g | Sugar: 24g | Vitamin A: 1200IU | Calcium: 80mg | Iron: 0.9mg Nutrition values are approximate.