Skip to content

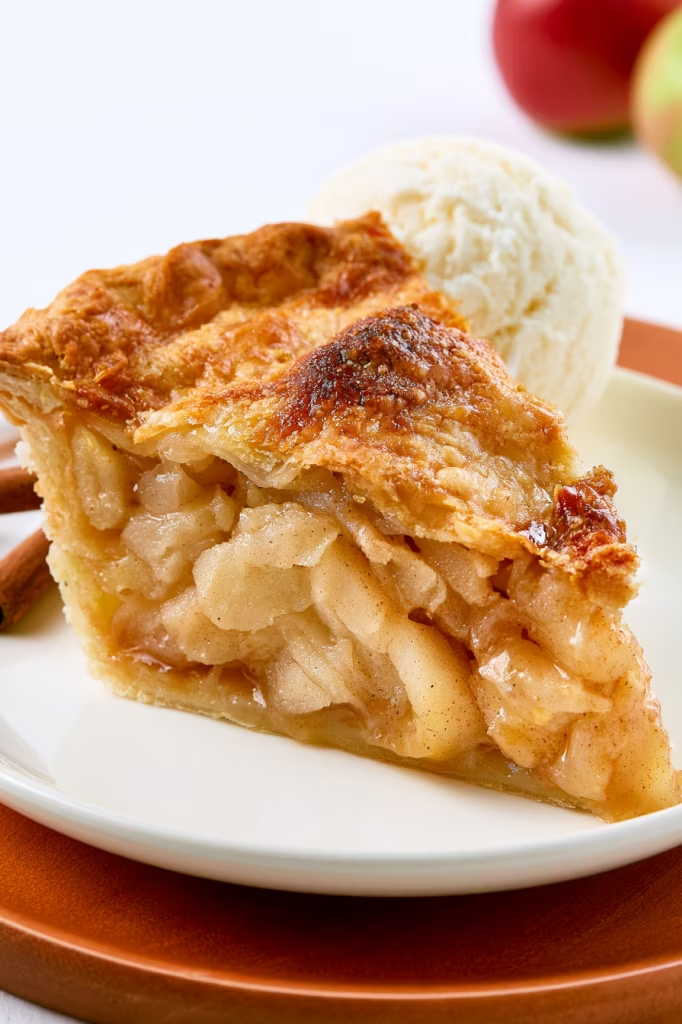
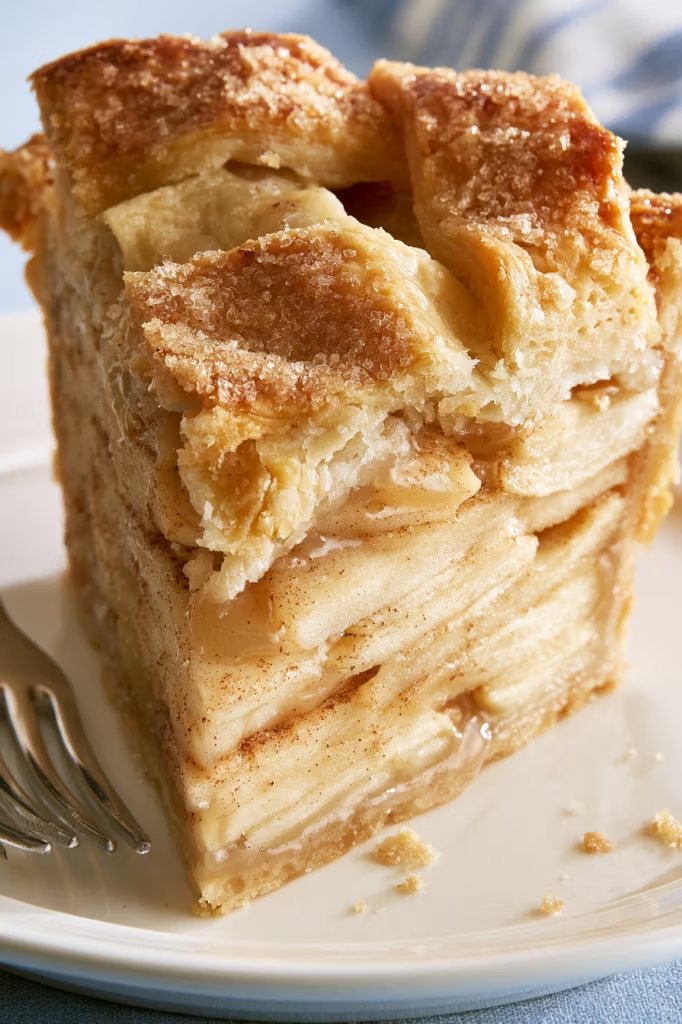
There’s something especially satisfying about pulling a homemade apple pie from the oven.
The crust is golden, the cinnamon-spiced filling is bubbling around the edges,
and the whole kitchen smells like apples and warm spices.
Give it a few hours to cool, and you’re rewarded with neat slices filled with tender apples that still have a little structure.
This recipe keeps that classic apple pie feeling wonderfully simple.
Granny Smith apples bring plenty of tartness, brown and granulated sugars add sweetness, and cinnamon, nutmeg, lemon juice, and zest round everything out.
Tucked between two flaky pie crusts, it’s the kind of dessert I’d happily bring to a holiday table—
or make simply because it’s apple season.
Why You’ll Love This Recipe
We’ve been loving how straightforward this pie is. There aren’t any unusual ingredients or elaborate techniques, but the finished pie still feels special.
Granny Smith apples are especially good here. They’re tart and firm, so they soften in the oven without disappearing into the filling.
Brown sugar and granulated sugar give the apples sweetness and a little extra depth, while cinnamon and nutmeg provide that cozy apple-pie flavor.
And then there’s the lemon juice and zest. They add just enough brightness to balance all that sweetness and spice.
Finally, the double pie crust wraps everything up in flaky pastry. Brush the top with egg wash, add sanding sugar if you like, and it bakes into a beautifully golden finish.
Apple Pie Ingredients
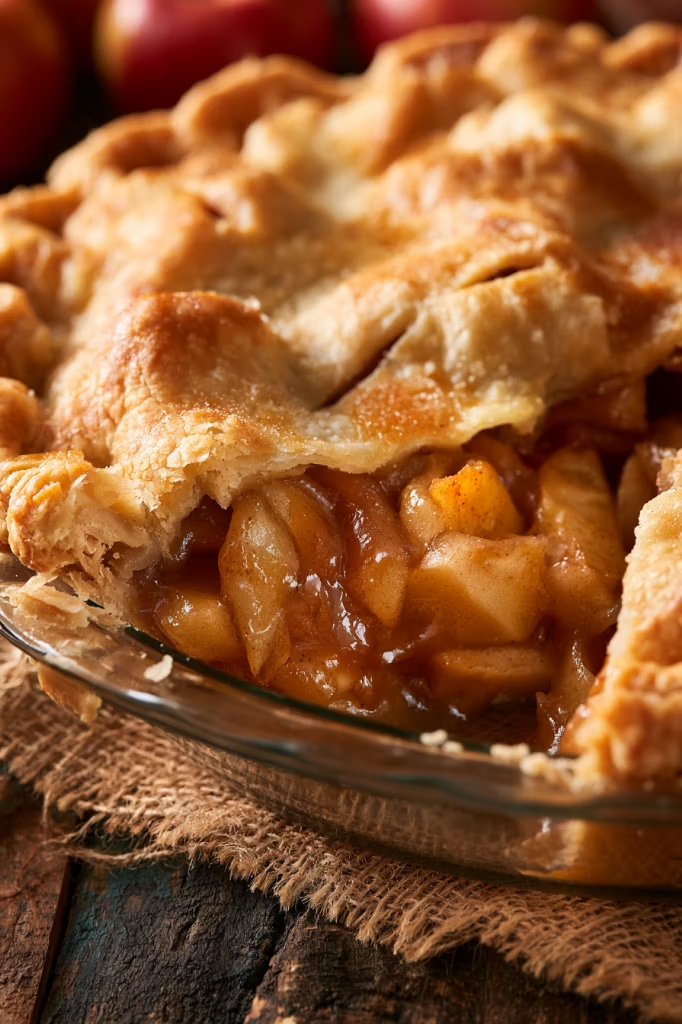
- Pie Crust – You’ll need two 9-inch pie crusts, one for the bottom and one for the top. Homemade flaky pie crust is wonderful here, but store-bought works too if you want to keep things easy.
- Granny Smith Apples – These tart, firm apples are a great choice for pie because they soften as they bake while still holding their shape. You’ll need 7 large apples, peeled, cored, and cut into ½-inch slices.
- Granulated Sugar – Adds sweetness to the tart apples and helps create that classic apple pie filling.
- Light Brown Sugar – Brings extra sweetness along with a deeper, slightly caramel-like flavor that pairs beautifully with the apples and spices.
- All-Purpose Flour – Helps thicken the juices released by the apples as the pie bakes, giving the filling a better consistency.
- Ground Cinnamon – The main warm spice in the filling. Cinnamon and apples are a classic combination, and it gives the pie its cozy aroma and flavor.
- Ground Nutmeg – You only need a small amount, but it adds another layer of warmth and complements the cinnamon.
- Lemon Juice and Zest – Add brightness and a little acidity, balancing the sweetness of the sugars and the tart flavor of the Granny Smith apples.
- Egg – Lightly beaten and brushed over the top crust before baking. The egg wash helps the pastry develop a beautiful golden finish.
- Sanding Sugar – This is optional, but sprinkling it over the egg-washed crust gives the finished pie a pretty, lightly crunchy topping.
Step-by-Step Instructions
Step 1
Start with the pie dough. You’ll need 2 (9″) pie crusts, and if you’re making them from scratch, give the dough at least 1 hour to chill before you roll it. Store-bought crust works here too—just follow the directions on the package.
Step 2
Place a rack in the center of the oven and heat it to 400°F (204°C).
Step 3
Now, make the apple filling! In a large bowl, toss the sliced Granny Smith apples with the granulated sugar, light brown sugar, flour, cinnamon, nutmeg, lemon juice, and lemon zest. Keep tossing until the apples are evenly coated.

Step 4
Take the chilled dough out of the refrigerator and let it sit for 5–10 minutes. On a lightly floured surface, roll the first disc into a 12-inch circle that is ⅛ inch thick, and carefully fit it into a deep-dish pie plate.
Step 5
Spoon in the apples, but leave behind and discard the juices at the bottom of the bowl. Roll the second crust to ⅛ inch thick and place it over the filling.
Step 6
Trim the excess dough, gently seal the top and bottom crusts together, and fold the edges underneath. Cut 4 slits into the top so steam can escape, and transfer the pie plate to a baking sheet.
Step 7
Brush the crust with the egg wash and sprinkle it with sanding sugar, if you’re using it. Cover the edges with a pie shield or foil for the first 25 minutes of baking.
Step 8
Bake at 400°F (204°C) for 25 minutes. Remove the shield, lower the temperature to 375°F, and bake for another 30–35 minutes. When the crust is golden and you can see the apple juices bubbling, it’s ready.
Step 9
Now comes the hard part: waiting! Let the pie cool at room temperature for at least 3 hours before slicing.
Expert Tips
For a really good apple pie, a few little details make a big difference.
First, try to keep those apple slices close to the specified ½-inch thickness. Similar-sized pieces cook more evenly, giving you tender apples without some pieces becoming overly soft.
When you add the filling to the crust, don’t be tempted to pour in the liquid sitting at the bottom of the bowl. Discarding those juices is part of the recipe, and it helps keep unnecessary moisture out of the bottom crust.
The pie shield is helpful, too. The exposed edges of pastry can brown faster than the center, so protecting them for the first 25 minutes gives the whole crust time to bake more evenly.
And definitely give the finished pie its 3-hour rest. Straight from the oven, the filling is still very hot and loose. Cooling gives everything time to settle, making the pie much easier to slice.

Recipe Variations
If you want to put your own spin on this pie without changing the filling, have fun with the crust.
Instead of a simple solid top, you can use the same pie dough to create a decorative finish. Or keep things wonderfully classic with the full top crust and four steam vents.
For an easier version, use the store-bought pie crust option already included in the recipe. You’ll still get all those cinnamon-spiced Granny Smith apples without making pastry from scratch.
You can also skip the optional sanding sugar if you prefer a simpler finish. The egg wash will still help the top crust develop a lovely golden appearance.
Storage & Reheating
One of the nice things about apple pie is that you don’t have to serve it the minute it’s made. In fact, this one needs at least 3 hours to cool, so it’s a great dessert to prepare ahead.
Once cooled, you can keep the pie loosely covered at room temperature for up to 2 days. For longer storage, cover it and place it in the refrigerator for up to 5 days.
I love apple pie at room temperature, but you can also gently warm a slice before serving. If keeping the crust crisp is important to you, warming it in the oven is a better choice than getting it piping hot in the microwave.
Serving Suggestions
A slice of this apple pie is plenty good all on its own. You get flaky pastry, tart-sweet apples, cinnamon, nutmeg, and just a touch of lemon in every bite.
But if you want to make it extra cozy, serve a slice slightly warm with a scoop of vanilla ice cream. A spoonful of lightly whipped cream is lovely too, and a little caramel sauce makes it feel especially indulgent.
For a holiday meal, serve it alongside coffee or hot tea after dinner. It’s exactly the kind of simple, familiar dessert that feels right at home on a Thanksgiving or Christmas table.
Recipe FAQs
1. Can I use store-bought pie crust?
Yes, you can definitely use store-bought pie crust to make this recipe even easier. You’ll need 2 (9-inch) pie crusts, one for the bottom and one for the top. Just follow the package directions for preparing the crust before assembling the pie.
2. Why should I use Granny Smith apples?
Granny Smith apples work especially well because they’re firm and tart. They hold their shape nicely as the pie bakes, so you get tender apple slices instead of a soft, mushy filling. Their tart flavor also balances out the granulated and brown sugars.
3. How do I keep my apple pie from getting watery?
Make sure to discard the extra juices at the bottom of the bowl when you spoon the apple filling into the crust. You’ll also want to let the baked pie cool for the full 3 hours before slicing. This gives the filling plenty of time to settle and makes it easier to cut clean slices.
4. How can I tell when the apple pie is done?
You’ll know it’s ready when the crust is golden brown and the apple juices are bubbling. Bake it at 400°F (204°C) for 25 minutes, then remove the pie shield, lower the oven to 375°F, and continue baking for another 30–35 minutes.
5. Do I really need to let the apple pie cool for 3 hours?
Yes, it’s worth the wait! The filling will still be very hot and loose when the pie first comes out of the oven. Letting it cool for at least 3 hours helps the filling set, so it stays inside the crust instead of running out when you cut your first slice.

Easy Homemade Apple Pie
Ingredients
- 2 (9") pie crusts
- 7 large Granny Smith apples (peeled, cored and sliced into ½ inch slices)
- 1/2 cup granulated sugar
- 1/2 cup light brown sugar (loosely packed)
- 2 tbsp all-purpose flour
- 1 tbsp ground cinnamon
- 1/8 tsp ground nutmeg
- 1 tablespoon lemon juice (plus the zest of half of a lemon)
- 1 large egg (lightly beaten in a small bowl for egg wash)
- 2 tbsp sanding sugar (optional)
Instructions
- Prepare a flaky pie crust recipe that makes 2 (9") pie crusts, one for the base and one for the top. Allow the pie dough to chill for at least 1 hour before rolling out. Alternatively, use a store-bought pie crust according to the package directions.
- Position an oven rack in the center of the oven and preheat to 400°F (204°C).
- Add the sliced apples, granulated sugar, light brown sugar, flour, cinnamon, nutmeg, lemon juice, and lemon zest to a large bowl. Toss until the apple slices are evenly coated.
- Take the pie crust dough out of the refrigerator and leave it at room temperature for 5–10 minutes. Lightly flour your work surface, then roll one disc of dough into a 12" circle that is ⅛" thick. Carefully transfer it to the bottom of a deep-dish pie plate.
- Spoon the apple mixture into the bottom crust, leaving behind and discarding the juices collected at the bottom of the bowl. Roll the second disc of pie dough until it is ⅛" thick, then place it over the apple filling.
- With a sharp knife, trim the dough around the outside edge of the pie plate. Lift the edges where the upper and lower crusts meet, gently press them together to seal, and fold them underneath. Turn the pie plate as you work until the entire edge is neatly tucked under. Cut 4 slits in the top crust to release steam, then set the pie on a baking sheet.
- Brush the top crust with the beaten egg and sprinkle with sanding sugar. Protect the edges with a pie shield or strip of foil so they do not become too brown during the first 25 minutes of baking.
- Bake at 400°F (204°C) for 25 minutes. Carefully take off the pie shield and reduce the oven temperature to 375°F. Continue baking for 30–35 minutes, until the top is golden brown and the filling juices are bubbling.
- Let the finished pie cool at room temperature for at least 3 hours before serving.
.
Recipe Notes