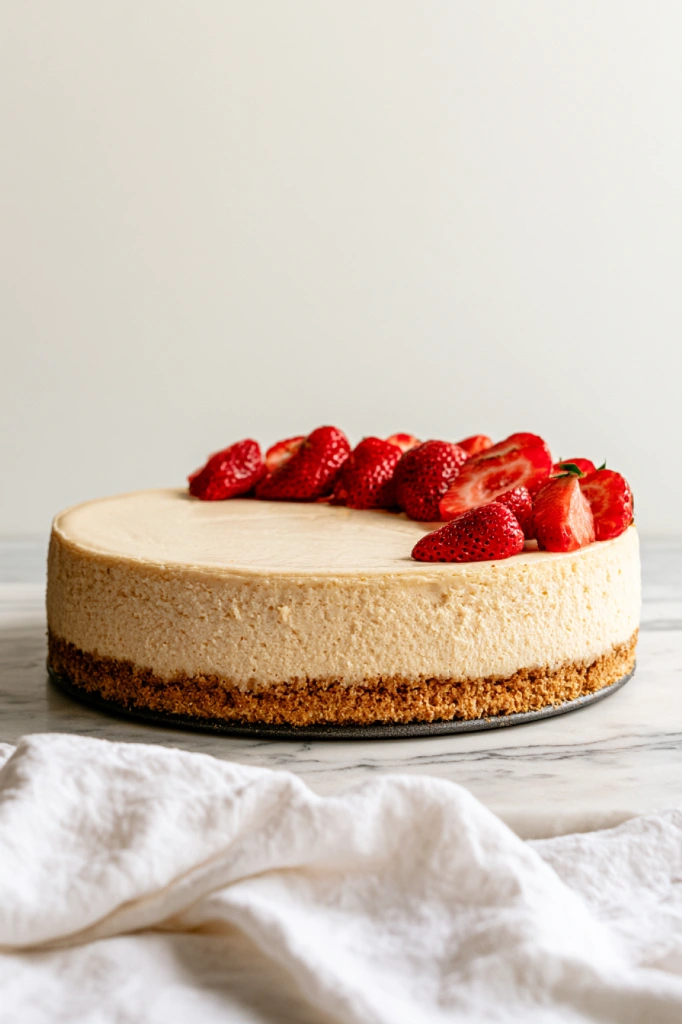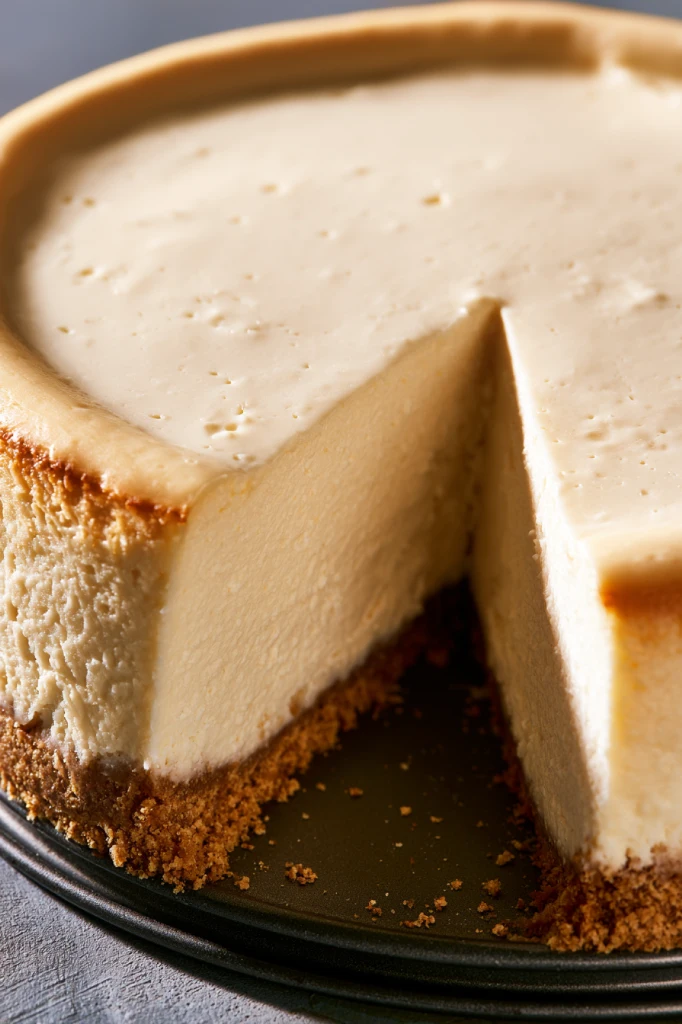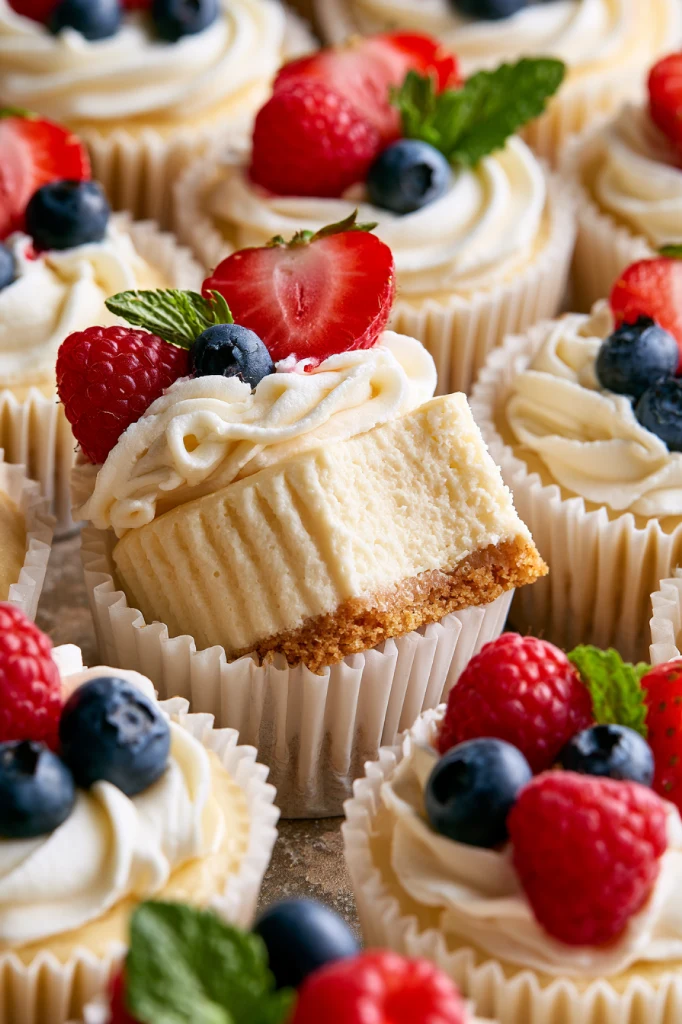


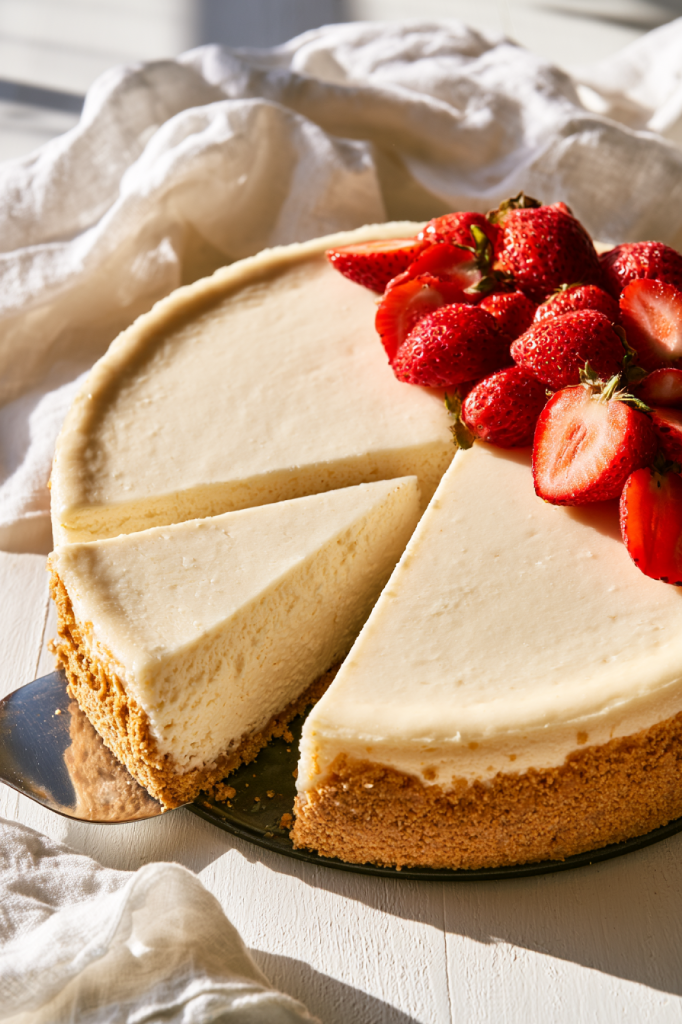
This classic cheesecake is the kind I’d make when I want dessert to feel special without adding lots of extras.
It starts with a simple graham cracker crust and has a rich cream cheese filling with sour cream, vanilla,
and a little fresh lemon juice. The flavor is sweet, tangy, and wonderfully simple.
And if cracks are the reason you’ve been nervous about baking cheesecake, this recipe takes a gentler approach.
The water bath helps it bake evenly, and the slow cool in the oven gives the filling time to settle.
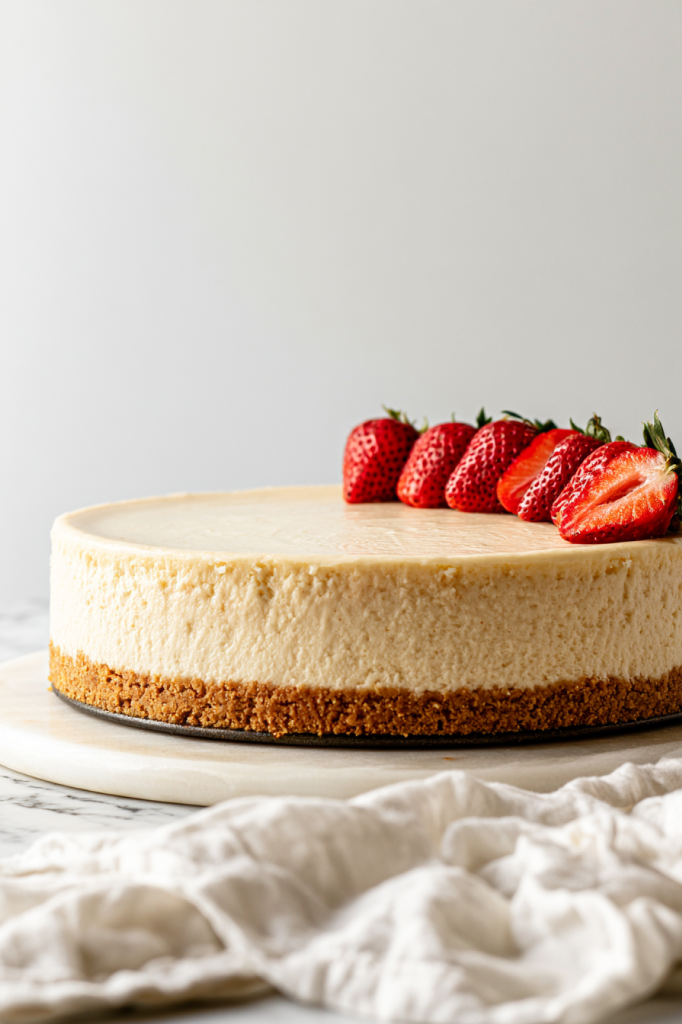
After a good chill in the fridge, it’s smooth, creamy, and ready for whatever topping you’re craving.
Why You’ll Love This Recipe
I love a cheesecake that actually tastes like cheesecake—not overly sweet and not buried under a dozen other flavors. This one lets the cream cheese shine, with sour cream adding a pleasant tang and vanilla and lemon rounding everything out.
It’s also a great dessert to make ahead. In fact, you have to give it time in the refrigerator, which means there’s no last-minute baking when you’re getting ready to serve it. Make it the day before, let it chill overnight, and dessert is already taken care of.
A few more reasons to make it:
- Creamy and smooth: The cream cheese and sour cream create that rich, velvety texture you want in a classic cheesecake.
- Not too sweet: One cup of sugar sweetens the filling while leaving plenty of room for its tangy cream cheese flavor.
- A classic crust: Graham cracker crumbs, sugar, and melted butter make a simple base with just enough crunch.
- Made for topping: Fresh berries, raspberry sauce, lemon curd, caramel, chocolate ganache, and whipped cream all work beautifully here.
- Freezer-friendly: You can freeze the finished cheesecake for up to 3 months, making it especially handy for holidays and celebrations.
Cheesecake Ingredients
- Cream Cheese – This is the heart of the cheesecake and gives it that rich, thick, creamy texture. Use full-fat brick cream cheese and let it soften to room temperature before mixing.
- Granulated Sugar – Adds just enough sweetness to balance the natural tanginess of the cream cheese and sour cream.
- Sour Cream – This makes the filling extra smooth and creamy while adding the subtle tang that gives classic cheesecake its signature flavor.
- Vanilla Extract – A little vanilla adds warmth and rounds out the rich cream cheese flavor.
- Fresh Lemon Juice – Just 2 teaspoons brighten up the filling and balance its richness. It’s optional, but definitely worth adding.
- Eggs – These give the cheesecake its structure and help the filling set as it bakes. Bring them to room temperature and mix them in one at a time, just until combined.
For the Graham Cracker Crust
- Graham Cracker Crumbs – These make the crisp, crumbly base for the cheesecake. You can use ready-made crumbs or finely crush about 12 full-sheet graham crackers.
- Granulated Sugar – Sweetens the graham cracker crumbs and helps create that classic cheesecake crust flavor.
- Unsalted Butter – Melted butter holds the crumbs together and gives the crust its buttery richness.
Step-by-Step Instructions
The recipe card below should remain exactly as written, but here’s a quick look at what you’ll be doing before you get started.
First, make the graham cracker crust. Turn the crackers into fine crumbs, combine them with the sugar and melted butter, and press the mixture across the bottom and partly up the sides of your springform pan. Give the crust its 10-minute head start in the oven while you move on to the filling.
Next, make the cheesecake filling. Beat the softened cream cheese and sugar until creamy, then mix in the sour cream, vanilla, and lemon juice. The eggs come last, one at a time. Once they’re incorporated, stop mixing. Cheesecake batter doesn’t benefit from lots of extra air.
Then, prepare the water bath. Wrap the springform pan with heavy-duty aluminum foil, set it inside a larger roasting pan, and pour the filling over the crust. Add enough hot water to the roasting pan to reach 1 inch deep.
Now, bake. The cheesecake needs 55–70 minutes in the oven. Instead of waiting for the center to become completely firm, look for set edges with a center that still has a slight wobble.
Finally, cool it slowly. Turn off the oven, crack the door, and leave the cheesecake inside the water bath for 1 hour. Then let it finish cooling at room temperature before covering and refrigerating it for at least 4 hours or up to 2 days.
That long chill is worth planning for. It’s when the filling finishes setting into the creamy, sliceable cheesecake you’ve been waiting for.
Expert Tips
Bring the cold ingredients to room temperature. This is one of those little details that makes cheesecake much easier. Softened cream cheese, room-temperature sour cream, and room-temperature eggs come together more smoothly, so you don’t have to keep beating the batter to get rid of lumps.
Go easy once you add the eggs. Add them one at a time and mix only until each one disappears into the filling. Too much mixing at this stage can incorporate excess air, which can contribute to rising, sinking, and cracking.
Don’t skip the water bath if you want the best texture. The hot water surrounds the cheesecake with gentle, humid heat instead of exposing it only to the dry heat of the oven.
Trust the wobble. A cheesecake doesn’t need to look completely firm before it comes out of the oven. After 55–70 minutes, the center should still move slightly when you gently tap or shake the pan.
Give it a gentle cooldown. Leave the cheesecake in the turned-off oven with the door slightly open for the full 1 hour specified in the recipe. Moving it immediately from a hot oven to a cooler kitchen creates a much more dramatic temperature change.
Don’t rush the refrigerator time. Chill for at least 4 hours. If you have the time, making the cheesecake the day before is wonderfully convenient.
Warm your knife before slicing. Dip a sharp knife in warm water and wipe it clean between slices. It takes a few extra seconds, but the slices come out much prettier.
Recipe Variations
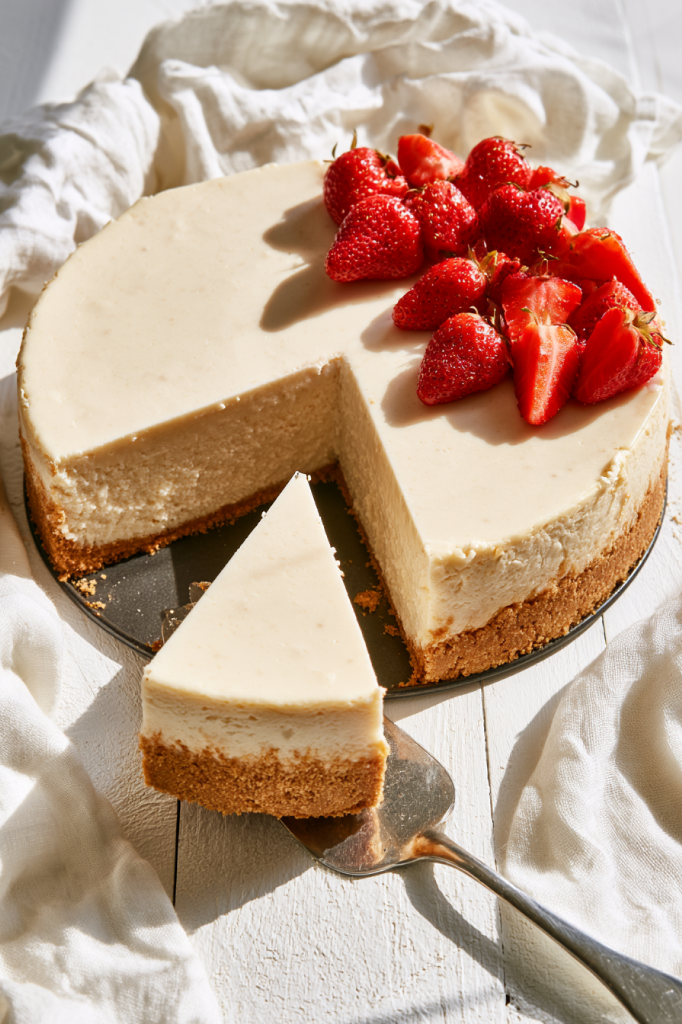
Once you have a good classic cheesecake, the easiest way to change it up is with what you put on top. That way, you can create a completely different dessert without touching the original cheesecake filling.
For something bright and fruity, spoon raspberry sauce or strawberry topping over each slice. Fresh berries are lovely too, especially when you want to keep things simple.
If you love citrus, try lemon curd. Its sharp, sunny flavor is a particularly nice contrast to the rich cream cheese filling.
For a more decadent finish, go with salted caramel or chocolate ganache. And if you’re serving a crowd with different tastes, leave the cheesecake plain and set several toppings on the table so everyone can finish their own slice.
You can also use the Oreo cookie crust variation included in the original recipe notes. Just remember to spray the bottom of the springform pan with nonstick spray and pre-bake the crust as directed.
Storage & Reheating
One of my favorite things about cheesecake is how happily it waits in the refrigerator. There’s no need to serve it the moment it’s made—in fact, it needs that resting time.
Once cooled, cover the cheesecake and refrigerate it for at least 4 hours or up to 2 days before serving. Leftover cheesecake can be covered and kept in the refrigerator for up to 4 days.
For longer storage, freeze it for up to 3 months. Keep the toppings off before freezing, then thaw the cheesecake overnight in the refrigerator and add your toppings just before serving.
And there’s no reheating needed here. This cheesecake is meant to be enjoyed chilled, when the filling is firm enough to slice but still wonderfully creamy.
Serving Suggestions
I’m perfectly happy with a thick slice of this cheesecake all on its own. With that buttery graham cracker crust and tangy vanilla filling, it really doesn’t need much.
But toppings are where you can have some fun.
For a fresh, colorful dessert, pile on berries or add a spoonful of raspberry sauce or strawberry topping. For something bright, try lemon curd. If dessert calls for maximum richness, chocolate ganache or salted caramel will get you there.
A little whipped cream is always welcome, too.
And if you’re serving this for a holiday or dinner party, I love the idea of keeping the cheesecake itself simple and putting a few toppings on the table. Everyone can dress up their own slice—and the classic cheesecake stays the star.
You May Also Love
From cozy classics to indulgent new favorites, these are the desserts our readers can’t stop making!
The Ultimate Chocolate Chip Cookie Recipe
Soft & Chewy Snickerdoodle Cookies
Brown Butter Brown Sugar Cookies
Quick and Easy Cinnamon Swirl Bread Recipe
The Ultimate Lemon Sugar Cookies
Recipe FAQs
1. How do I know when my cheesecake is done?
The edges should look set, but the center should still have a slight wobble when you gently shake the pan. Don’t wait for the middle to become completely firm or the cheesecake may overbake. For this recipe, it should take about 55–70 minutes.
2. Do I really need to use a water bath?
Yes, I recommend using the water bath for the best results. It gives the cheesecake gentle, even heat and helps keep the filling creamy while reducing the chance of cracks. Just make sure the springform pan is wrapped well with heavy-duty foil before adding the hot water.
3. Why does my cheesecake batter have lumps?
This usually happens when the cream cheese or other refrigerated ingredients are too cold. Make sure the cream cheese, sour cream, and eggs are at room temperature before you start. They’ll blend together much more easily and give you a nice smooth batter.
4. How can I keep my cheesecake from cracking?
The biggest thing is to not overmix the batter, especially after adding the eggs. You’ll also want to use the water bath and cool the cheesecake slowly. Once it’s baked, turn off the oven, crack the door slightly, and leave the cheesecake inside for 1 hour before cooling completely at room temperature.
5. Can I make this cheesecake ahead of time?
Yes! This is actually a great dessert to make ahead because it needs plenty of time to chill. You can refrigerate the cheesecake for up to 2 days before serving, or freeze it for up to 3 months. If frozen, let it thaw overnight in the refrigerator and add any toppings before serving.
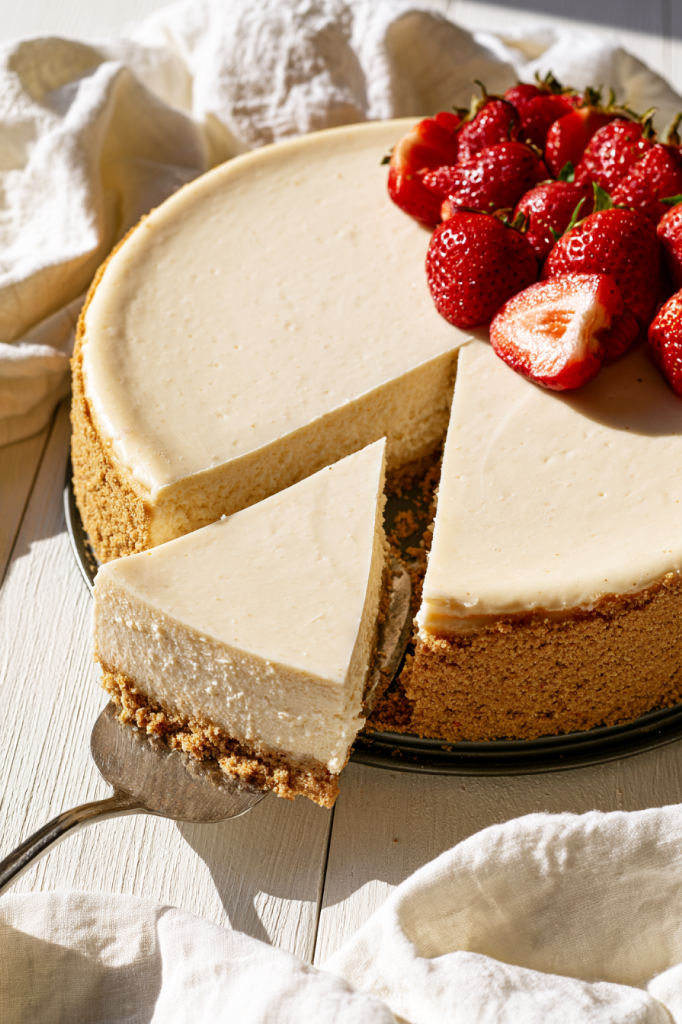
Classic Baked Cheesecake
Ingredients
Graham Cracker Crust
- 1 1/2 cup (180g) graham cracker crumbs (about 12 full-sheet graham crackers)
- 1/4 cup (50g) granulated sugar
- 5 tbsp (71g) unsalted butter, melted
Cheesecake
- 32 ounces (904g) full-fat brick cream cheese, softened to room temperature
- 1 cup (200g) granulated sugar
- 1 cup (240g) full-fat sour cream, at room temperature
- 1 tsp pure vanilla extract
- 2 tsp fresh lemon juice (optional, but recommended)
- 3 large eggs, at room temperature
Instructions
- Position an oven rack in the lower-middle part of the oven. Preheat the oven to 350°F (177°C).
- Prepare the crust. If using whole graham crackers, process or blend them into fine crumbs. Transfer the crumbs to a medium bowl and mix in the granulated sugar. Stir in the melted butter until the mixture has a sandy consistency, breaking apart any larger clumps. Transfer the mixture to an ungreased 9-inch or 10-inch springform pan. Press it firmly, but not excessively, across the bottom and partway up the sides. A flat-bottomed measuring cup can be used to even out the surface. Bake the crust for 10 minutes, then remove it from the oven and set it aside while making the filling.
- Prepare the cheesecake filling. Using a handheld mixer or a stand mixer fitted with the paddle attachment, beat the cream cheese and granulated sugar together on medium-high speed for about 2 minutes, until smooth and creamy. Add the sour cream, vanilla extract, and lemon juice, and mix until completely incorporated. Reduce to medium speed and add the eggs one at a time, mixing only until each egg disappears into the batter before adding the next. Stop mixing as soon as the final egg is incorporated to avoid adding too much air. The finished batter will measure close to 6 cups.
- Set up the water bath. Bring a kettle or pot of water to a boil. You will need enough hot water to reach approximately 1 inch deep in the roasting pan. While the water heats, carefully wrap the outside of the springform pan with 1 or 2 sheets of heavy-duty aluminum foil, taking care if the pan is still warm. Set the wrapped springform pan inside a large roasting pan. Pour the cheesecake filling over the baked crust and smooth the top with a spatula. Carefully add the hot water to the roasting pan, then transfer everything to the oven. You may also place the roasting pan in the oven before pouring in the hot water if that is easier.
- Bake for 55–70 minutes, until the outer portion of the cheesecake is set but the center still moves slightly when the pan is gently tapped or shaken. If the top begins browning too much, loosely cover it with aluminum foil partway through baking. Once the cheesecake reaches the proper consistency, turn off the oven and leave the door slightly open. Keep the cheesecake in the water bath inside the cooling oven for 1 hour. Then remove it from the oven and water bath, discard the foil, and place the springform pan on a cooling rack. Allow the cheesecake to cool completely at room temperature. Once cool, cover it and refrigerate for at least 4 hours or up to 2 days.
- Before serving, run a knife around the inside edge of the springform pan, then release and remove the outer ring. Slice with a sharp knife. For cleaner cuts, wipe the blade between portions and dip it in warm water before making each new slice.
- Serve with your preferred toppings. Cover any remaining cheesecake and refrigerate it for up to 4 days.
.
Recipe Notes
Nutrition
Per serving (based on 16 servings):Calories: 384kcal | Carbohydrates: 27g | Protein: 6g | Fat: 28g | Saturated Fat: 15g | Cholesterol: 116mg | Sodium: 260mg | Potassium: 131mg | Fiber: <1g | Sugar: 21g | Vitamin A: 264IU | Vitamin C: 1mg | Calcium: 83mg | Iron: 1mg Nutrition values are estimates and can vary depending on the specific brands of ingredients used and the size of each slice.