Skip to content
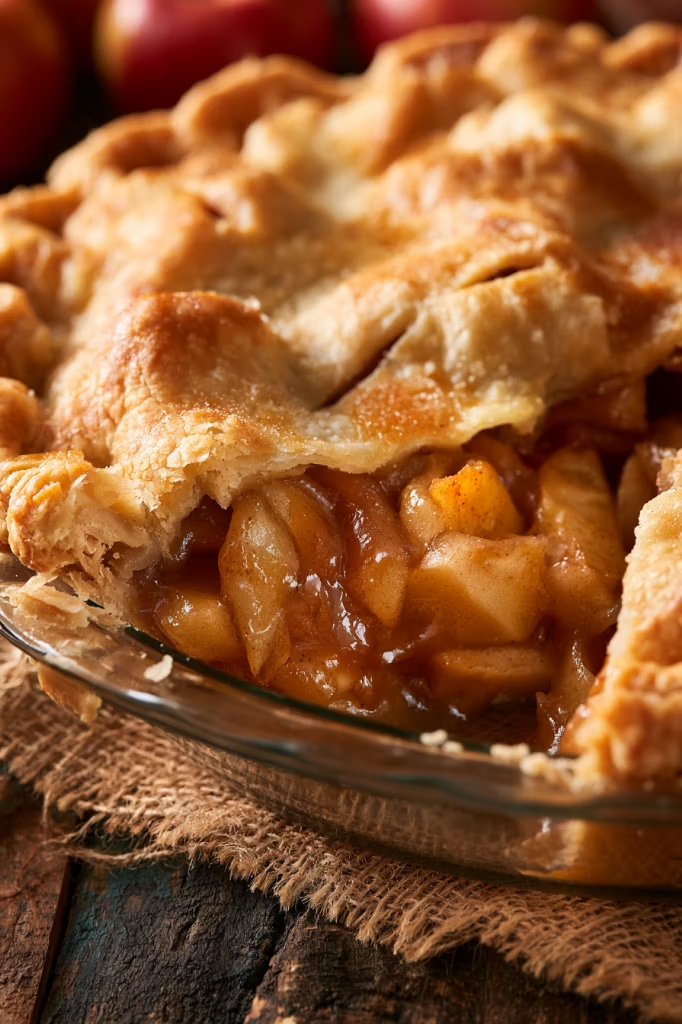
Fresh from the oven, with cinnamon-scented apples bubbling beneath a golden lattice crust, this homemade apple pie is the kind of dessert that makes the whole kitchen feel warm and inviting. Add a scoop of vanilla ice cream, and it’s hard to imagine a better way to end a fall dinner.
There’s so much to love about a classic apple pie, but for me, it’s all about the contrast. The crust is buttery and flaky, while the apples underneath are soft, saucy, and warmly spiced with cinnamon. As the pie bakes, the filling thickens around the fruit and starts bubbling through the lattice, which is always a good sign that something delicious is coming.
This is especially lovely for Thanksgiving and holiday dinners, but I wouldn’t save it just for special occasions. Give it plenty of time to cool before slicing, then serve generous pieces with vanilla ice cream. Cozy, simple, and classic!
Why You’ll Love This Recipe
This apple pie has everything I look for in a classic fall dessert: a flaky homemade crust, plenty of apples, and a thick cinnamon filling that settles beautifully once the pie cools.
I also love that the filling is prepared before it goes into the crust. Butter, flour, water, and sugar cook together to make a sauce that coats every apple slice. Then, the whole thing bakes beneath a woven lattice crust until the juices are thick and bubbling.
And while that lattice top makes the finished pie look extra special, the process itself is approachable. It’s a wonderful pie to bring to Thanksgiving dinner, make for a fall gathering, or bake on a quiet weekend when you’re craving something warm and nostalgic.
Apple Pie Ingredients
- Pie Crust – You’ll need 2 disks of homemade pie crust to make the bottom crust and the lattice top. Keeping the dough chilled helps it bake up flaky and hold its shape.
- Granny Smith Apples – These tart, firm apples are a great choice for pie because they balance the sweetness of the filling and hold up well as they bake.
- Butter & Flour – These cook together to create the base of the sauce, giving the apple filling its thick, rich consistency.
- Water – Helps turn the butter, flour, and sugar mixture into a smooth sauce that can coat the apple slices.
- Sugar – Sweetens the filling and balances the tartness of the Granny Smith apples.
- Cinnamon – Gives the apples that warm, cozy spice that makes a classic apple pie taste like fall.
- Egg Wash – A mixture of egg and water brushed over the lattice crust before baking helps give the finished pie a shiny, golden-brown top.
Step-by-Step Instructions
First, prepare the crust. Make the pie crust and refrigerate it as directed. When you are ready to assemble the pie, position an oven rack in the center and preheat the oven to 425˚F.
Next, cook the sauce. Melt the butter in a medium saucepan over medium heat. Add the flour and whisk continuously for 1 minute. Whisk in the water and sugar. Allow the mixture to simmer for 3 minutes, then take it off the heat. Do not cook it beyond this point.
Now, prepare the apples. Peel and core the apples, then cut them into slices about 1/4″ thick. Add the cinnamon and toss until evenly distributed. Pour in the prepared filling mixture and stir until the apple slices are thoroughly coated.
Then, shape the bottom crust. Roll one disk of dough into a 12-inch diameter circle. Transfer it to a 9-inch deep pie pan. Spoon in the apple mixture, arranging it slightly higher in the center. Keep the filling away from the rim of the dough so the crust can be sealed properly.
For the top, make the lattice. Roll the second disk of dough into an 11-inch diameter circle and divide it into 10 strips. Lay half of the strips across the filling, then weave the remaining strips through them to form a lattice. Crimp the perimeter to seal the top and bottom crusts together. Brush the pastry with egg wash.
Finally, bake the pie. Bake at 425˚F for 15 minutes. Reduce the oven temperature to 350˚F and bake for another 45 minutes. The pie is ready when thick juices can be seen bubbling through the lattice for at least 5 minutes.
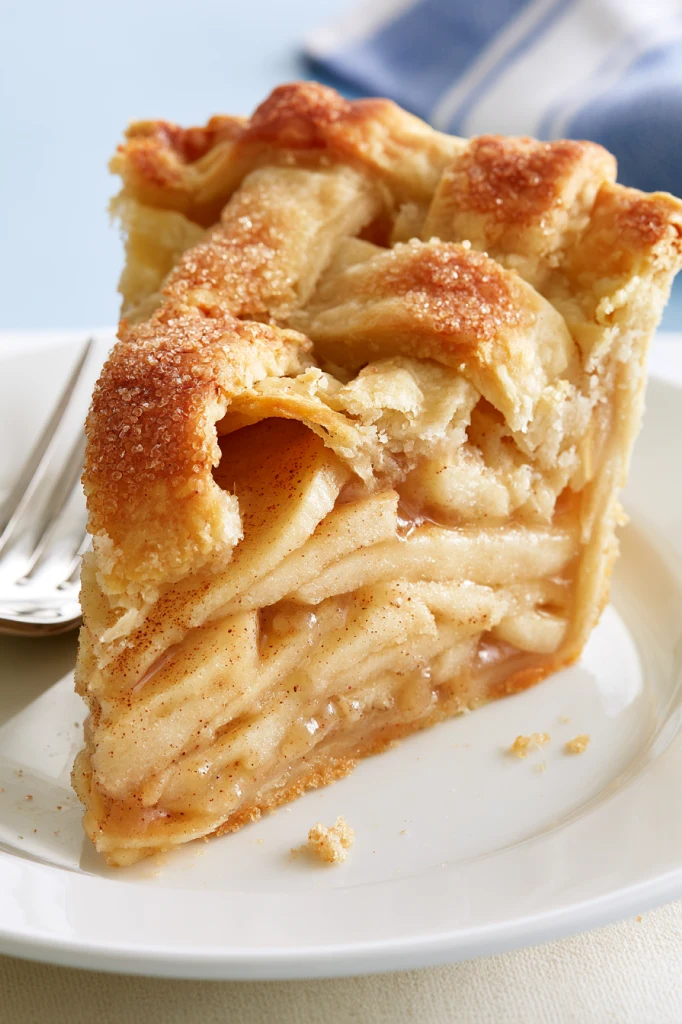
Leave the finished pie to cool for at least 1 hour. This resting period allows the juices to thicken and helps the slices hold together when cut.
Expert Tips
A few small details make a big difference with this pie. First, keep your pie crust chilled until you’re ready to work with it. A cold crust holds its shape better in the oven and gives you that flaky texture you want around the apples.
When you make the filling, watch the clock. The sauce only needs to simmer for 3 minutes. Cooking it for too long can make it overly thick or cause it to separate.
I also recommend keeping those apple slices close to 1/4″ thick. Evenly sliced apples cook more consistently, so you don’t end up with some pieces that are very soft while others are still firm.
And don’t rush the cooling time! I know a warm apple pie is incredibly tempting, but those 60 minutes matter. As the pie rests, the filling thickens and sets, giving you much neater slices.
If the crust is becoming too brown before the filling is ready, protect it with a pie shield. You can also cut a 3″ circle from the center of a square sheet of foil and loosely place it over the pie with the dull side facing down.

Recipe Variations
Granny Smith apples are a great fit here because their tart flavor balances the sweetness of the filling, and their firm texture holds up nicely during baking.
You can also experiment with other crisp apples. Golden Delicious, Jonagold, Honeycrisp, Fuji, Braeburn, and Pink Lady can all work, or you can combine a few varieties to give the filling a mix of sweet and tart flavors. If you choose sweeter apples, you may want to use less sugar.
For a little extra warmth, you can also add a pinch of nutmeg along with the cinnamon. It’s a small addition, but it pairs beautifully with baked apples.
If you want to make the recipe exactly as written, stick with the original ingredients and quantities.
Storage & Reheating
Apple pie is a great dessert to enjoy beyond the day you bake it. Once it has cooled completely, cover it well before storing so that the filling stays moist and the crust doesn’t dry out.
For longer storage, keep the covered pie in the refrigerator. When you’re ready for another slice, you can enjoy it chilled, allow it to come closer to room temperature, or gently warm it before serving.
For the best crust texture, I like reheating slices in the oven. It warms the apple filling while helping the pastry regain some of its crispness. A microwave works when you’re short on time, though the crust will become softer.
Serving Suggestions
There’s nothing wrong with eating a slice of this apple pie exactly as it is. The buttery lattice crust and cinnamon apples already give you plenty of flavor and texture.
But if I’m serving it for dessert, especially while the pie is still a little warm, I love adding a scoop of vanilla ice cream. The ice cream starts melting into the warm apple filling, and that combination of cold, creamy vanilla, saucy apples, and flaky pastry is hard to beat.
Serve it after Thanksgiving dinner, bring it to a fall gathering, or make it for a cozy weekend dessert. A warm drink alongside—coffee, tea, or apple cider—makes it even more inviting.
Recipe FAQs
1. What are the best apples to use for apple pie?
Granny Smith apples work great in this pie because they’re firm, tart, and hold up well while baking. You can also use Honeycrisp, Fuji, Braeburn, or Pink Lady, or mix a few varieties together for a nice balance of sweet and tart.
2. How do I know when my apple pie is done?
Look for the filling to be thick and bubbling through the lattice crust. You want to see those juices bubbling for at least 5 minutes before taking the pie out of the oven. The crust should also be nicely golden brown.
3. Why is my apple pie filling runny?
Most likely, the pie was sliced before it had enough time to cool. Let the pie rest for at least 1 hour after baking. This gives those warm apple juices time to thicken and set so you can get cleaner slices.
4. What if my pie crust is browning too quickly?
Simply cover the edges with a pie shield or foil and continue baking. You can also cut a 3″ circle from the center of a square piece of foil and loosely place it over the pie with the dull side facing down. This keeps the crust from getting too dark while the apples finish baking.
5. Can I use store-bought pie crust?
Yes, you can definitely use store-bought pie crust to make things easier. Homemade crust will give you that extra buttery, flaky texture, but store-bought is a great shortcut when you’re short on time. Either way, keep the crust cold until you’re ready to assemble and bake the pie.


Classic Homemade Apple Pie
Ingredients
- 1 recipe double pie crust
- 2 1/4 lbs Granny Smith apples, peeled and cored (6–7 apples or 7 cups thinly sliced)
- 1 1/2 tsp cinnamon
- 8 tbsp unsalted butter
- 3 tbsp all-purpose flour
- 1/4 cup water
- 1 cup granulated sugar
- 1 egg
Instructions
- Prepare the crust. Make the pie crust and refrigerate it as directed. When you are ready to assemble the pie, position an oven rack in the center and preheat the oven to 425˚F.
- Cook the sauce. Melt the butter in a medium saucepan over medium heat. Add the flour and whisk continuously for 1 minute. Whisk in the water and sugar. Allow the mixture to simmer for 3 minutes, then take it off the heat. Do not cook it beyond this point.
- Prepare the apples. Peel and core the apples, then cut them into slices about 1/4″ thick. Add the cinnamon and toss until evenly distributed. Pour in the prepared filling mixture and stir until the apple slices are thoroughly coated.
- Shape the bottom crust. Roll one disk of dough into a 12-inch diameter circle. Transfer it to a 9-inch deep pie pan. Spoon in the apple mixture, arranging it slightly higher in the center. Keep the filling away from the rim of the dough so the crust can be sealed properly.
- Make the lattice. Roll the second disk of dough into an 11-inch diameter circle and divide it into 10 strips. Lay half of the strips across the filling, then weave the remaining strips through them to form a lattice. Crimp the perimeter to seal the top and bottom crusts together. Brush the pastry with egg wash.
- Bake the pie. Bake at 425˚F for 15 minutes. Reduce the oven temperature to 350˚F and bake for another 45 minutes. The pie is ready when thick juices can be seen bubbling through the lattice for at least 5 minutes.
- Cool before slicing. Leave the finished pie to cool for at least 1 hour. This resting period allows the juices to thicken and helps the slices hold together when cut.
.
Recipe Notes